
DATASHEET KXC-WA9
Overview
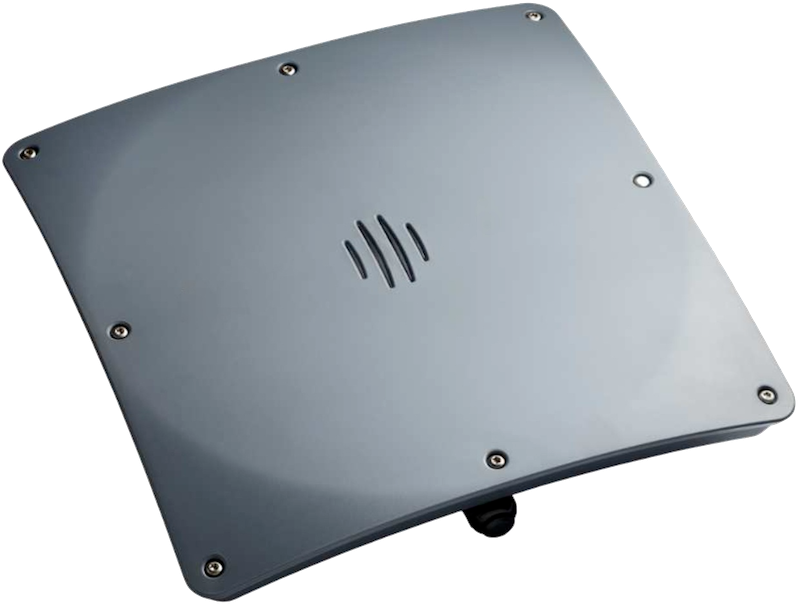
The Kentix IP wall reader WA9 enables the contactless activation of doors and barriers with a UHF RFID chip. The long-range wall reader can read RFID chips up to a distance of 8 meters. The housing complies with protection class IP67. The setup always consists of the actual wall reader and the connected Kentix AccessManager. The wall reader is connected to the AccessManager via a 4-wire connection. The AccessManager itself connects directly to a Power over Ethernet (PoE) capable network switch. To control electric strikes/motor locks, the SmartRelay offers two relay outputs and, depending on the power class of the strikes, an integrated PoE splitter with 24VDC output.
Safety instructions
No modifications of any kind may be made to Kentix GmbH products, with the exception of those described in the relevant instructions.
When installing Kentix devices, certain degrees of protection must be guaranteed.
Observe the relevant regulations for installations in the respective environment.
Only operate the products within the defined temperature range.
The instructions should be passed on to the user by the person carrying out the installation.
Kentix accepts no liability for damage to the devices or components caused by incorrect installation. Kentix accepts no liability for incorrectly programmed units.
Kentix accepts no liability for faults, material damage or other damage.
moisture, dirt and damage during transportation, storage and operation.
Only operate the products within the defined temperature range.
Installation and battery replacement may only be carried out by trained specialist personnel in accordance with the instructions.
Do not charge, short-circuit, open or heat batteries.
Observe the correct polarity when inserting the batteries.
The devices must always be operated with the batteries intended for the product.
When changing the batteries, always replace all batteries.
Dispose of old or used batteries properly.
Keep batteries out of the reach of children.
Mounting a reader on the side of a barrier or gate for a windshield transponder
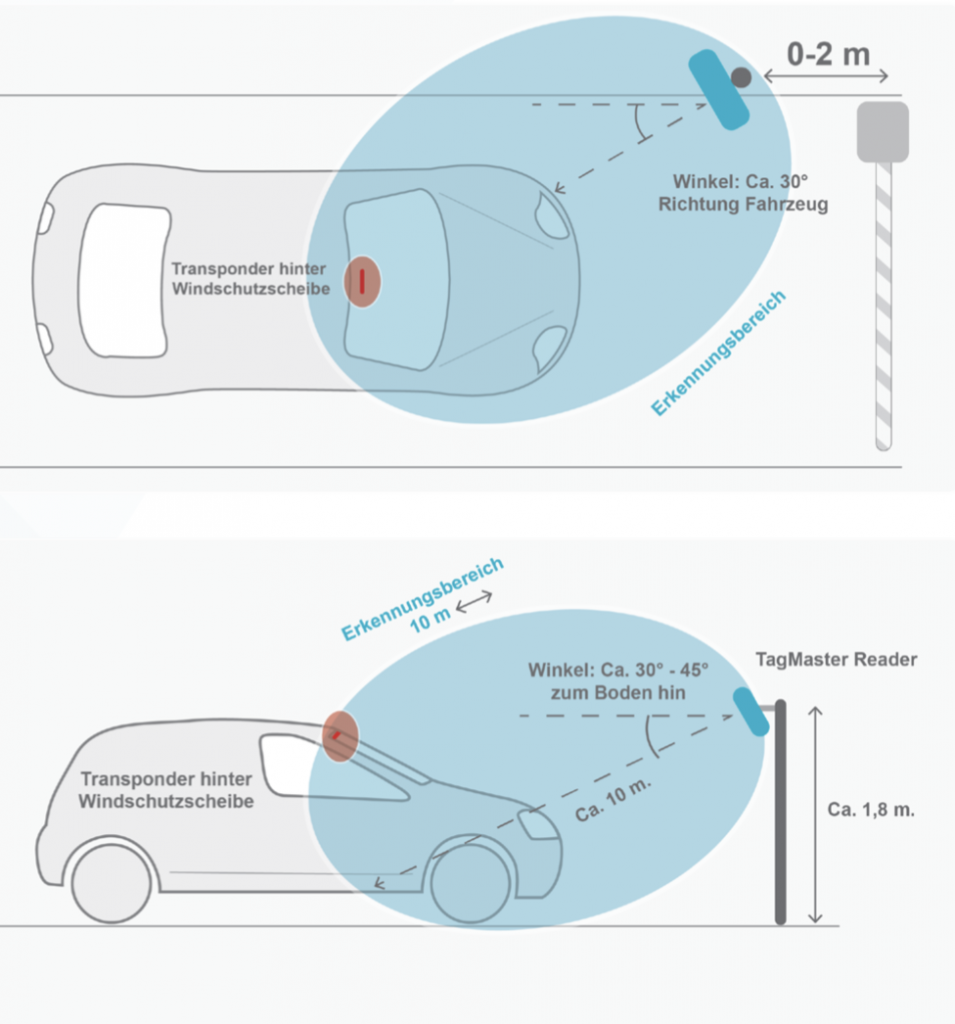
Reader arrangement
Distance from the barrier: Approx. 2 m in front of the barrier, on a post or similar near the road. The vehicle reaches the detection area earlier during the approach. Thus, the barrier will be opened a little earlier to allow smoother passage.
Height: approx. 1.8 m
Orientation: 30° – 45° towards the ground, 20° – 30° towards the vehicle.
Readers: XT Mini, XT-1, XT-5.
Transponder: ISO Card, ISO Combi Card, Windshield Tag (windshield transponder).
Mounting a reader on the side of a barrier or gate for a headlight transponder

Reader arrangement
Distance from the barrier: Approx. 2 m in front of the barrier, on a post or similar near the road. The vehicle reaches the detection area earlier during the approach. Thus, the barrier will be opened a little earlier to allow smoother passage.
Height: about 1.0 – 1.2 m.
Orientation : 15º – 20º towards the ground, 30° towards the vehicle.
Readers: XT Mini, XT-1, XT-5.
Transponder: Headlight tag (headlight transponder), item no.: 227000.
Mounting a reader above a driveway or gateway
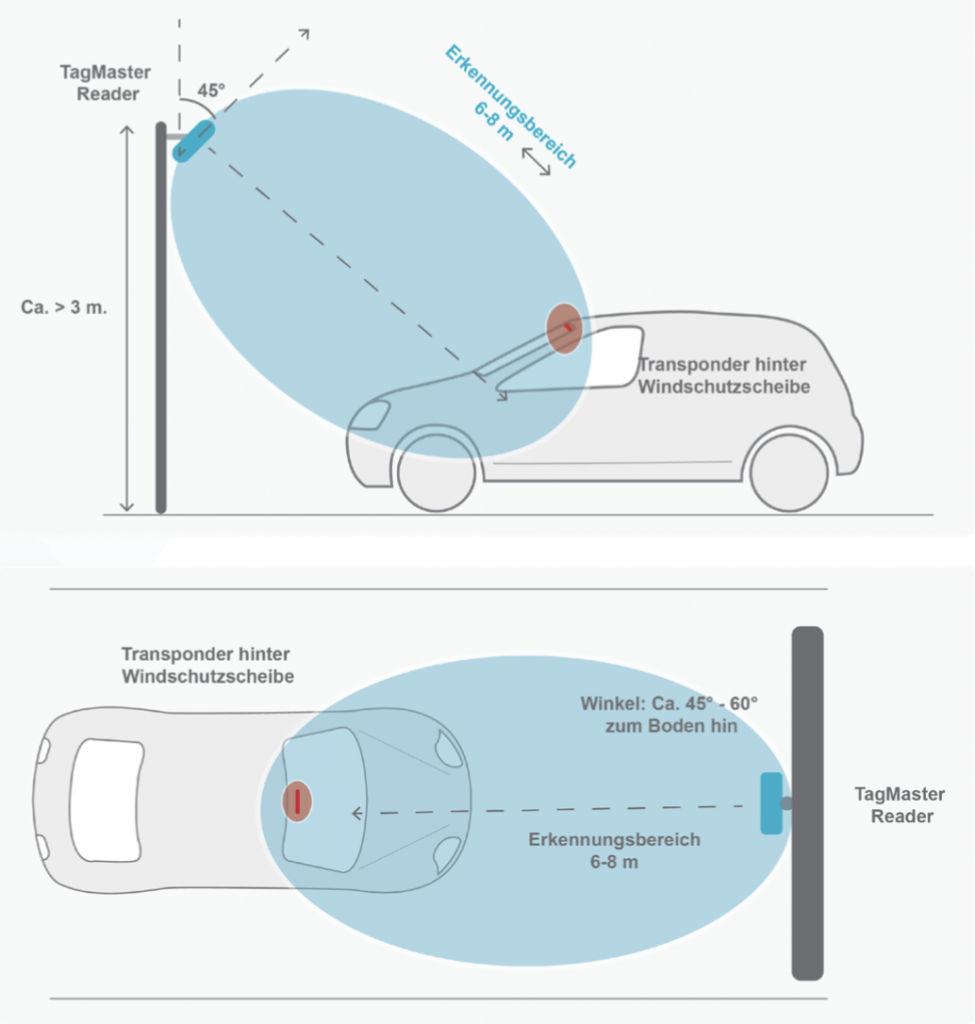
Reader arrangement
Distance between floor and reader: 2.5 – 3 m.
Position: Centered above the entrance or gate.
Angle: Align the reader with the floor. Angle: 45° – 60
Height: approx. > 3 m.
Readers: XT Mini, XT-1, XT-5.
Transponder: ISO Card, ISO Combi Card, Windshield Tag (windshield transponder).
Mounting readers on both sides of a gate or barrier
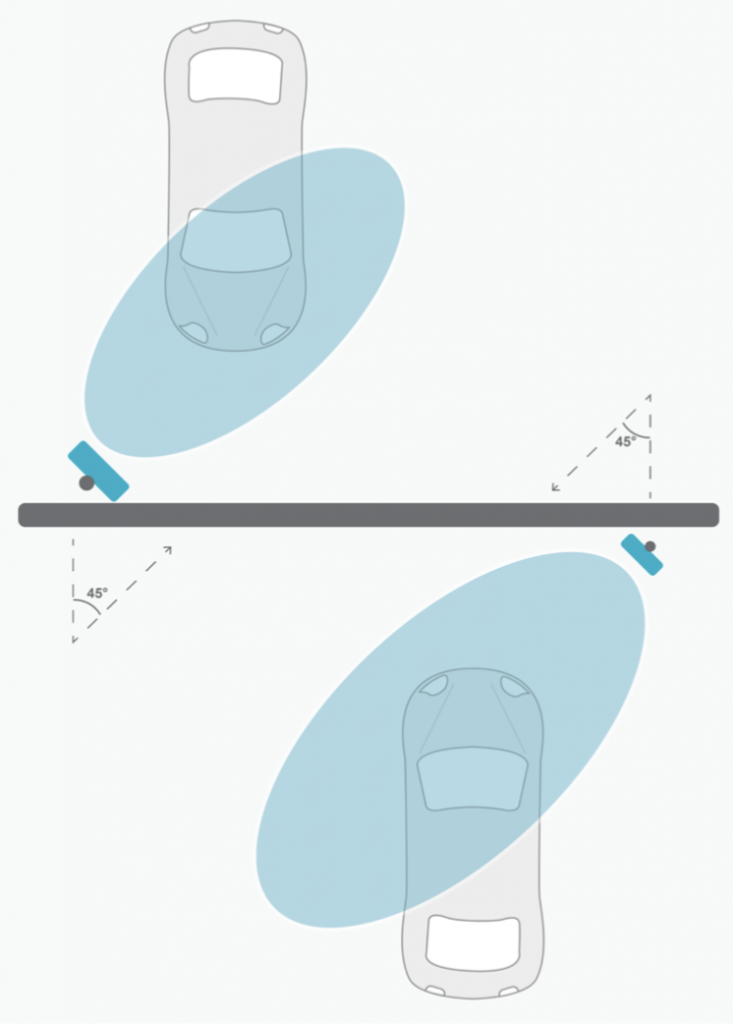
Reader arrangement
Position: Attach the reader to the right side of the gate (right-hand traffic).
Angle: 30° – 45° towards the vehicle.
Setup for centrally located readers and road barriers
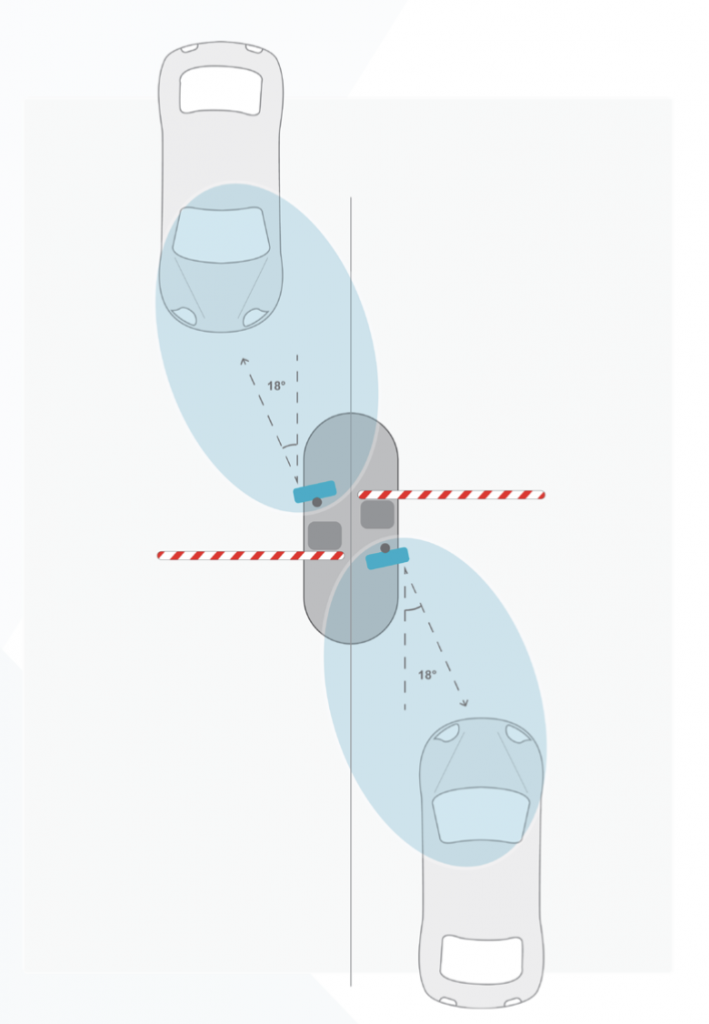
Arrangement of the reader
Position: Centrally arranged readers and road barriers.
Arrange one reader in each direction.
Angle: 15° – 20° towards the vehicle.