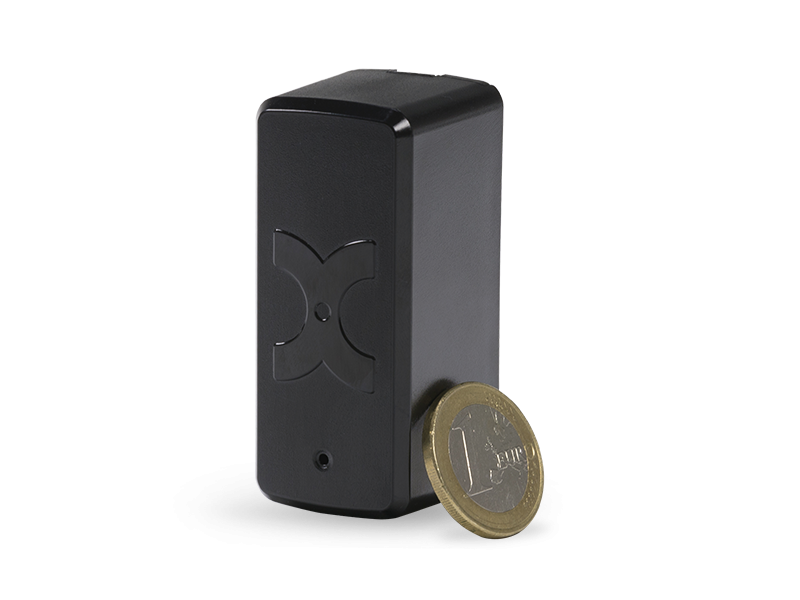
DATASHEET MULTISENSOR-DOOR
The MultiSensor-DOOR is a battery-operated MultiSensor that can be networked via radio. The sensor is particularly suitable for monitoring windows and doors, but can also be used for environmental monitoring in IT racks.
The MultiSensor-DOOR requires a suitable remote station for radio operation. This wireless remote station is formed by the network-capable MultiSensors (MultiSensor-LAN or MultiSensor-TI), which also act as a wireless Ethernet gateway.
A SiteManager or AlarmManager in the MAIN-DEVICE operating mode is required for central management. Teach-in and configuration are performed entirely via the KentixONE web interface. The radio range between the gateway (MultiSensor-LAN) and MultiSensor-DOOR can be up to 20m. Up to 25 wireless sensors can be taught-in to a wireless Ethernet gateway.
Safety instructions
No modifications of any kind, other than those described in an appropriate manual, are permitted to Kentix GmbH products.
Certain levels of protection must be provided when installing Kentix equipment.
Observe the relevant regulations for installations in the respective environment.
Only operate the products within the defined temperature range.
The instructions should be passed on to the user by the person carrying out the installation.
Kentix accepts no liability for damage to the equipment or components resulting from incorrect installation. No liability is accepted for incorrectly programmed units.
Kentix shall not be liable in the event of malfunctions, damage to property or other damage.
Protect moisture, dirt and damage.
Only operate the products within the defined temperature range.
Installation and battery replacement may only be carried out by trained personnel in accordance with the instructions.
Do not charge, short circuit, open or heat batteries.
When inserting the batteries, pay attention to the correct polarity.
The devices must always be operated with the batteries intended for the product.
When changing batteries, always replace all batteries.
Dispose of old or used batteries properly.
Keep batteries out of the reach of children.
Controls
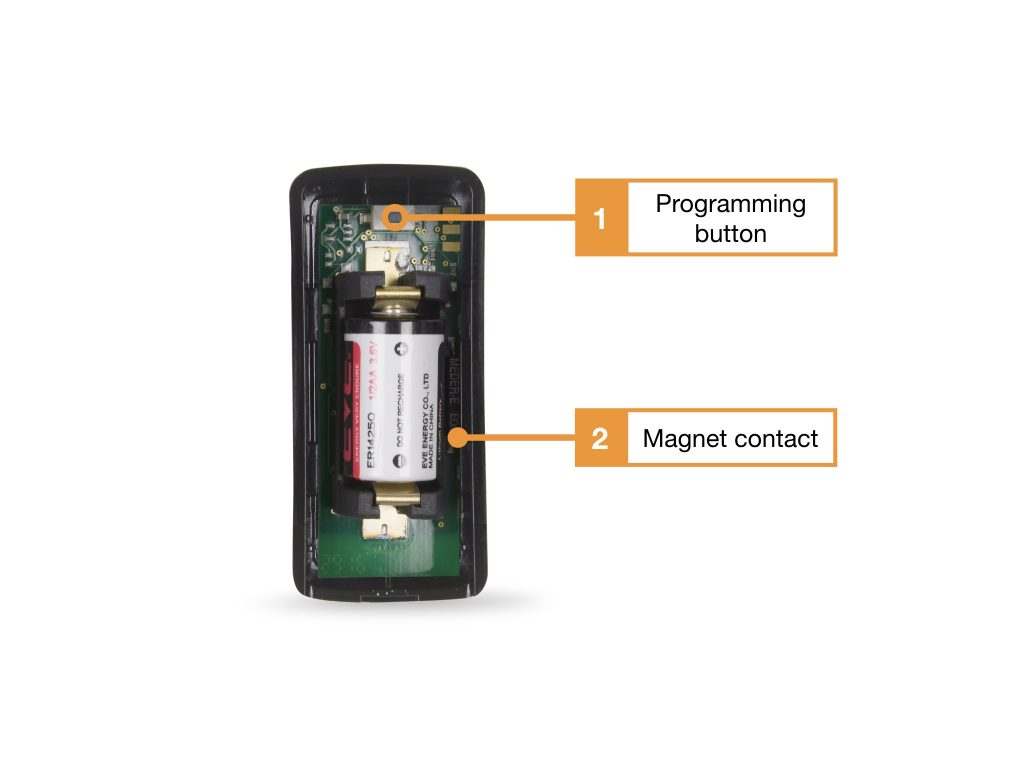
- Teach-in key: This key is used to teach the device into the wireless network. To teach-in the sensor, start the teach-in process in the web interface of the manager and then press the teach-in button for 3sec. Press until a signal tone is heard
- Magnetic contact
Opening the housing and changing the battery
The circuit board of the MultiSensor-Door is located in the upper part of the housing, which is plugged onto the lower part. To open the housing, press down the catch on the underside of the housing and slide the housing cover upwards. This can then simply be removed.
Remove the battery from the holder and replace it with an equivalent type, see Datasheet.
The battery level of the MultiSensor-Door is constantly monitored by the manager. When the battery is low, an alert is sent via SMS and e-mail to all administrators. Then replace the battery as soon as possible.
Connect with radio network
- MultiSensor-DOOR must be within radio range of a fully configured wireless Ethernet gateway (MultiSensor-LAN or MultiSensor-TI). It is recommended to carry out the teach-in process closer than the actual installation range, approx. 3-5m.
- Start the teach-in process in the KentixONE web interface in the “Detail View” area via the “Add device” button.
- Now press the teach-in button on MultiSensor-DOOR for approx. 3 seconds with the battery inserted. After approx. 5-10 seconds, the MultiSensor-DOOR should be recognized as a new sensor.
- Finally, carry out the configuration and place the MultiSensor-DOOR at the intended installation location and connect it to the wireless network.
Assembly instructions
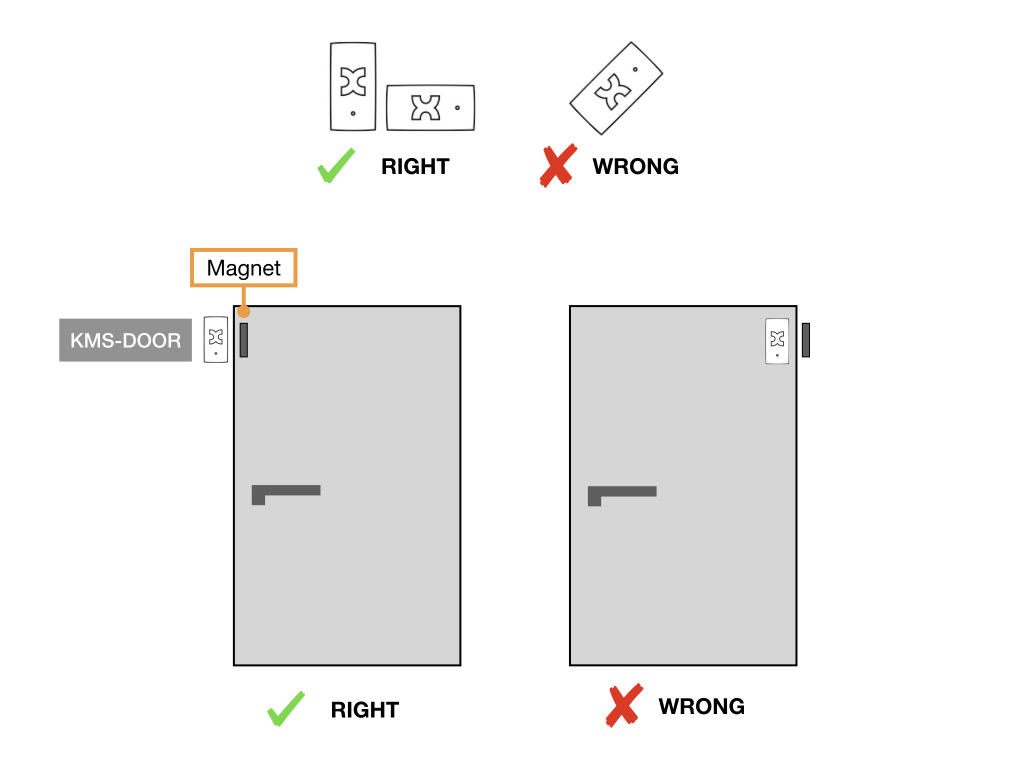
For optimal function, please observe the following instructions during installation:
Use of the reed contact
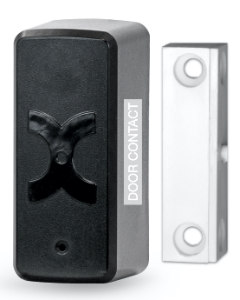
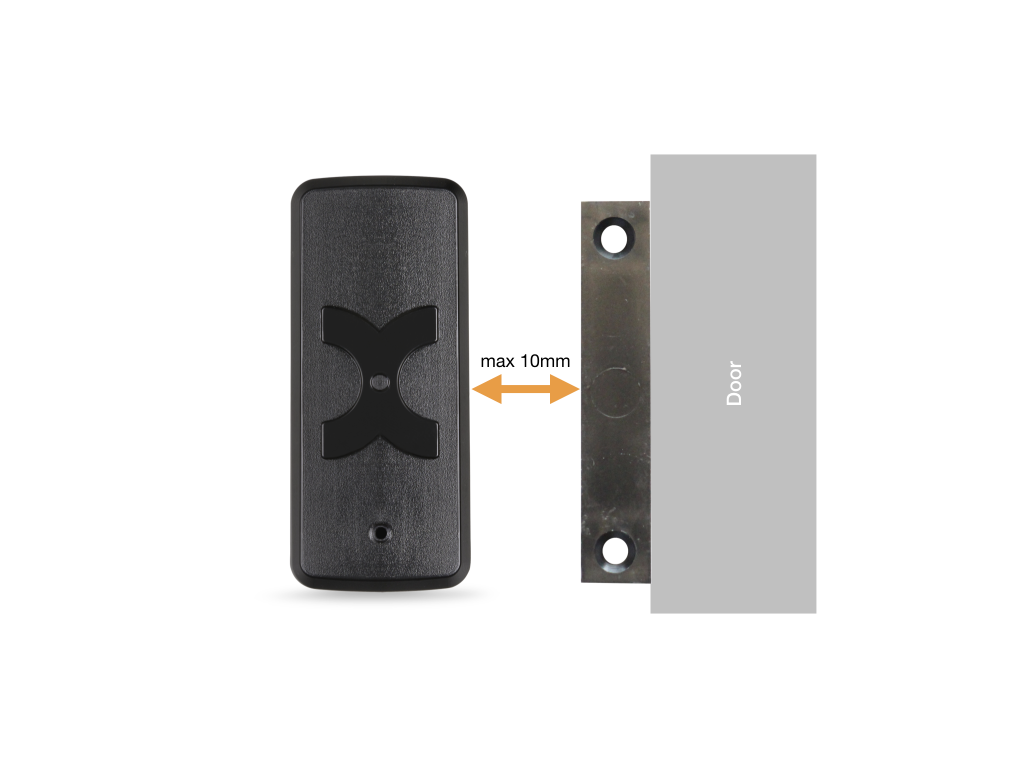
The reed contact expands the MultiSensor-Door with an additional alarm contact for clear open/closed detection of door or window. The contact reacts to magnetic fields (magnet included). Wiring is not required for commissioning.
To ensure the functionality of the contact, make sure that the magnet is mounted at a maximum distance of one centimeter and aligned laterally to the housing of the MultiSensor.
Configuration with KentixONE
The device is configured via the web browser in KentixONE. The device must be accessible to the central KentixONE instance on the network side. Depending on the device type, a communication key and the IP address or DHCP name of the central KentixONE instance must also be set on the device (MultiSensors, AccessManager, SmartPDU). IP cameras or IO modules, on the other hand, can be integrated directly into KentixONE.
All information about the software can be found in the KentixONE section and the associated documentation.