Brief introduction
The KentixONE software runs either on the SiteManager as a hardware appliance, on which it is already pre-installed, or virtualized as a Docker container on your own servers. For projects with up to 500 networked devices, we recommend the SiteManager hardware appliance for easy integration. The Docker container is ideal for large enterprise applications.
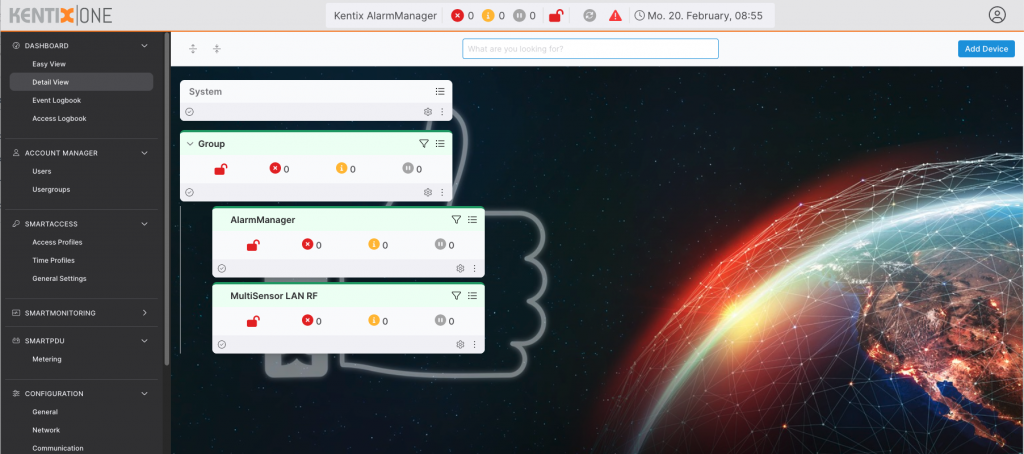
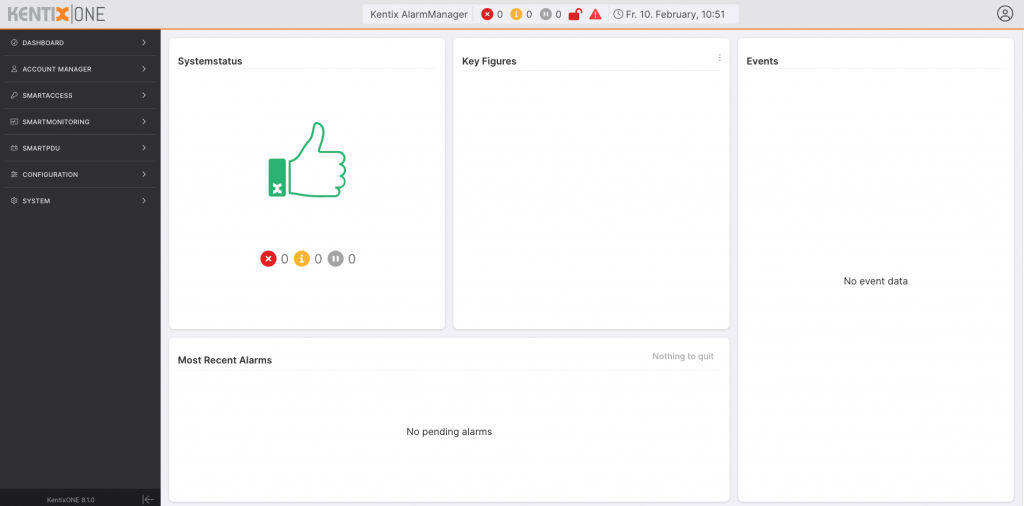
The KentixONE software environment is based on the most advanced web technologies and offers a state-of-the-art, easy-to-understand graphical user interface in the web browser. To make use as simple and intuitive as possible, there are various levels, such as the “EasyView” view. With this view, you can see the complete system status at a glance. The central element is the Kentix thumb. It shows whether your building, your infrastructure or your system is secure. If action is required, KentixONE takes you directly to the “DetailView” view to find out more about the alarm or warning statuses. In the “DetailView” view, the structure of your project is precisely mapped with buildings, floors, rooms or functions. Extensive filter and intelligent search functions take you directly to the information you need. The KentixONE interface is both a configuration and user interface.
The most important functions of KentixONE at a glance:
Function
- Smart web dashboard
- Smartphone app (iOS, Android)
- E-mail – Push – SMS
- Autom. Software Deployment
- Autom. Backups
- Multitenant
Integration
- LDAP and Active Directory
- REST API based on JSON
- WEB hooks (JSON, XML CSV)
- SNMP V2/3 with standard MIB
- Modbus TCP/RTU
- Alarm synchronous video images
Security
- Own SSL/TLS certificates
- Custom REST API Key
- AES128/256 encryption
- Regular security updates
- Sabotage monitoring
- IEEE802.1.X authentication
Here you can find a detailed function overview of KentixONE.
Compatibility
KentixONE is shipped on all Kentix products with firmware version 08.x.x or later.
Update existing devices
For the update of already used products you will find all necessary downloads in the Kentix-Shop.
Products with firmware version 5 or lower cannot be used for Kentix ONE.
Before the update, the compatibility of the devices must be checked. Only products from a certain production date are updateable.
The year and month of production are noted on the stickers on the devices or in the web interface.
The date of manufacture can also be determined using the serial number.
A serial number consists of several elements and is structured as shown in the following example:
12ab4567xy890
The digits a and b stand for the year of production, whereby the numbers are rotated.
Example:
a=1, b=2
12 rotated results in 21
This device is from the year 2021.
The digits x and y contain the month of manufacture.
Example:
x=1, y=0
Results in 10, rotated= 01.
This device was therefore produced in January 2021.
Not compatible with Kentix ONE are devices with the following production dates:
Access Manager
KXP-16-LAN: older 07/18
MultiSensors
KMS-LAN: older 01/18
KMS-LAN-RF: older 01/18
Alarm Manager Basic and Pro
KAM: older 01/18
Other
Keypad KKPT-Touch: No longer supported in Kentix ONE
Quick start
To operate KentixONE, it is recommended that you use one of the following devices as the main controller:
| IMAGE | TYPE | ART |
|---|---|---|
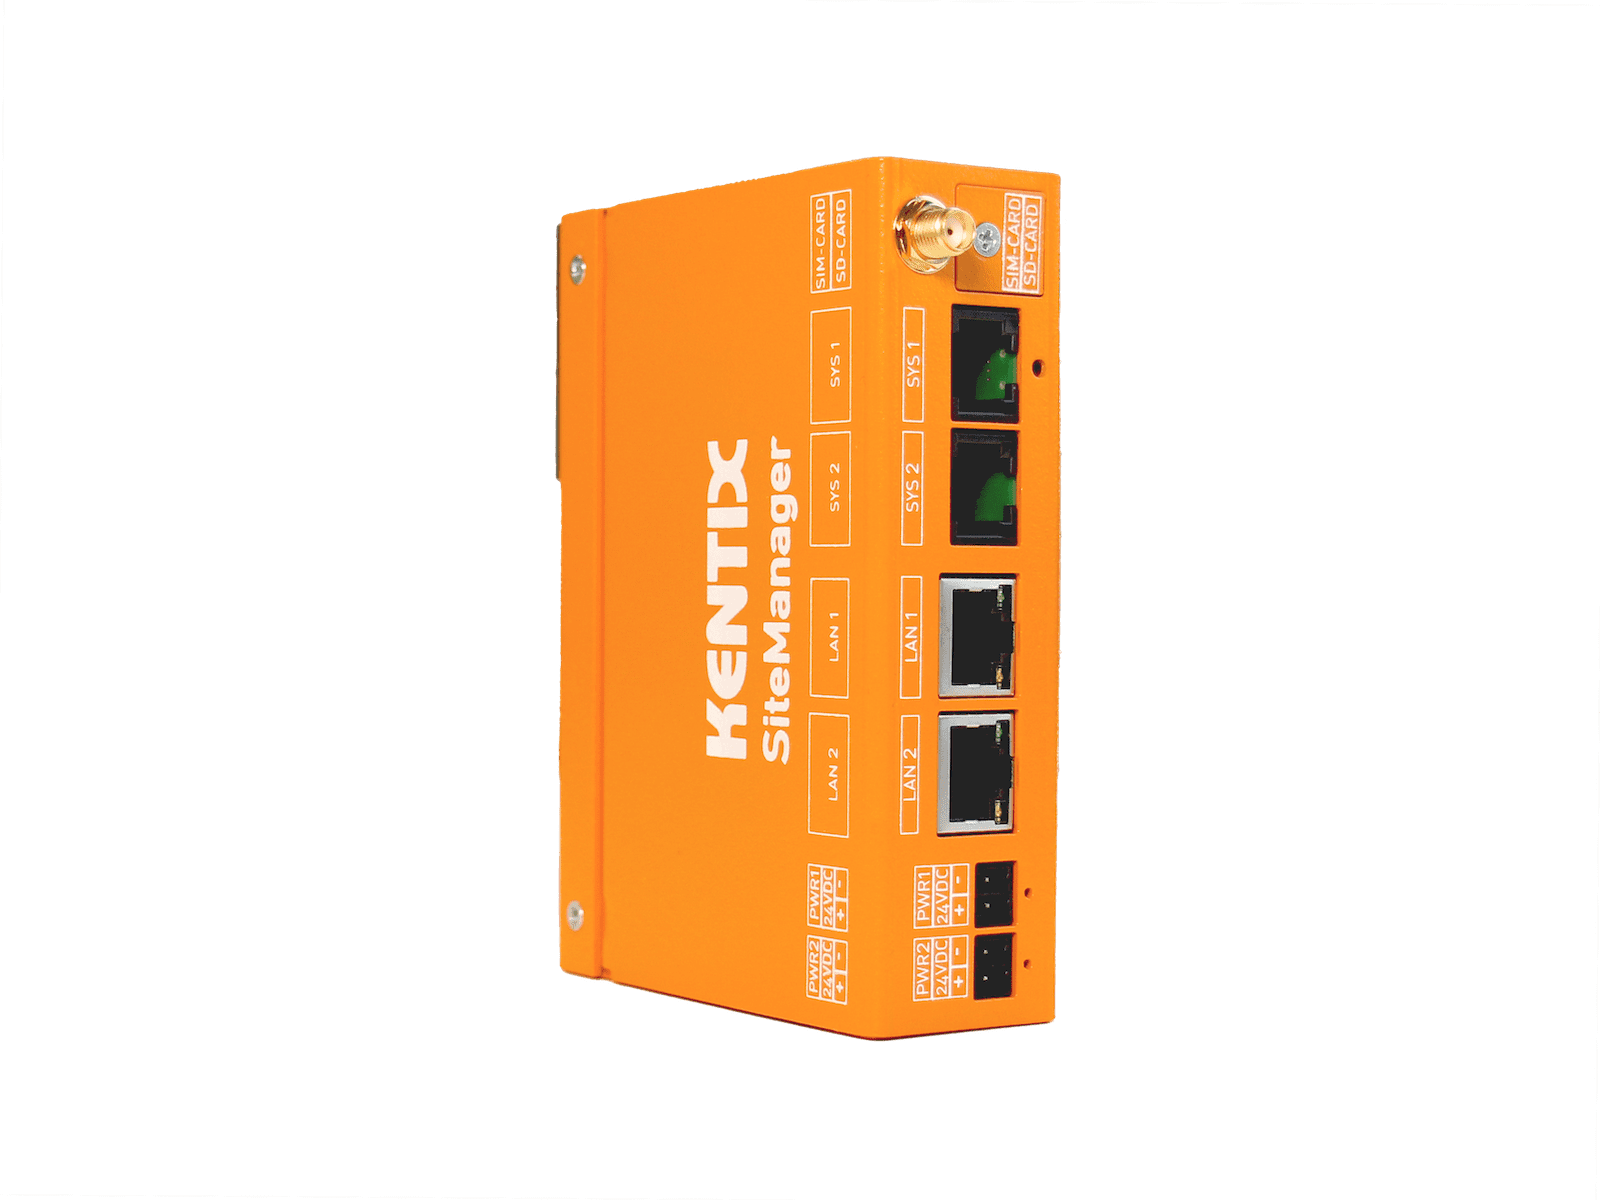 | SiteManager (Appliance) DATASHEET | KSM-DR-1 |
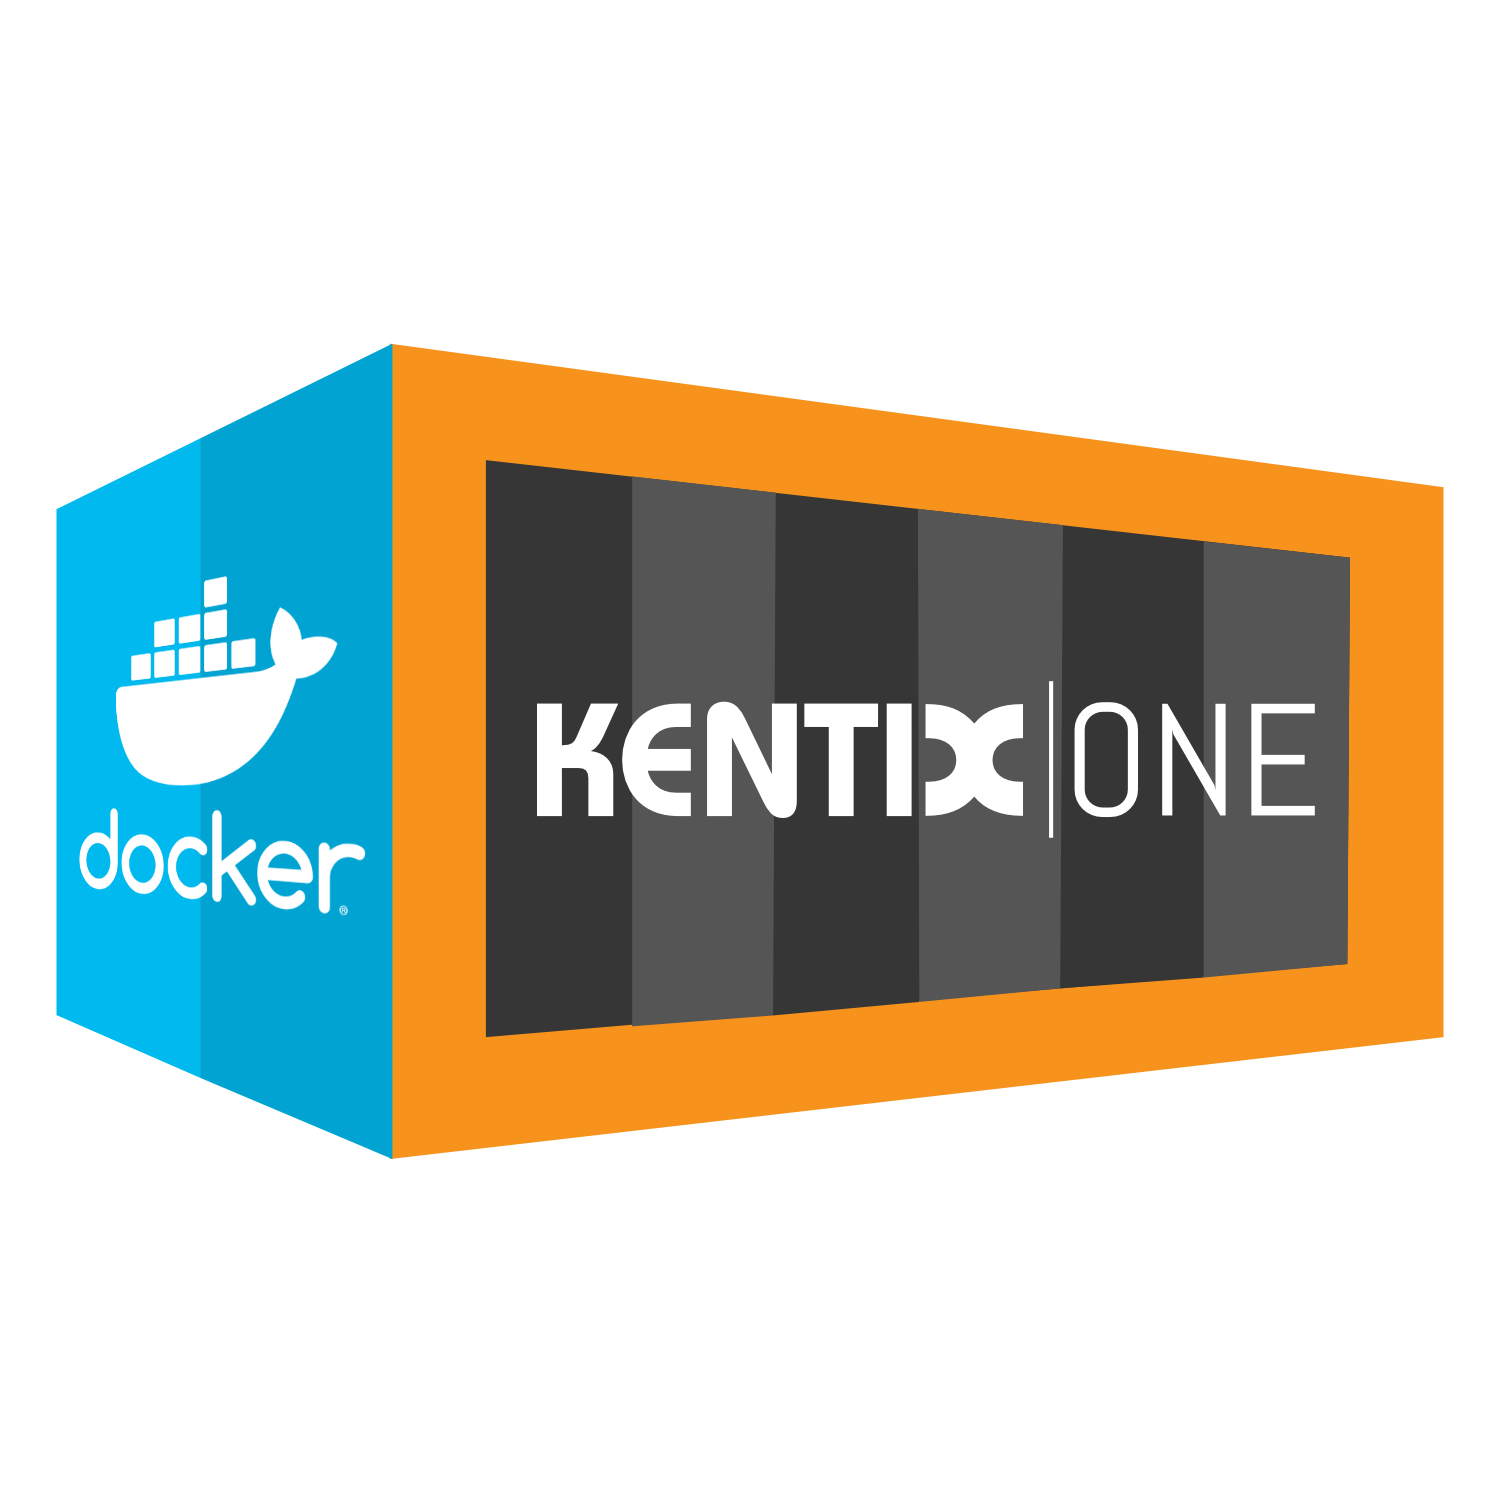 | Docker Container (Virtualized) | KSM-DOCKER-1 |
Initial commissioning with the SiteManager
The setup wizard
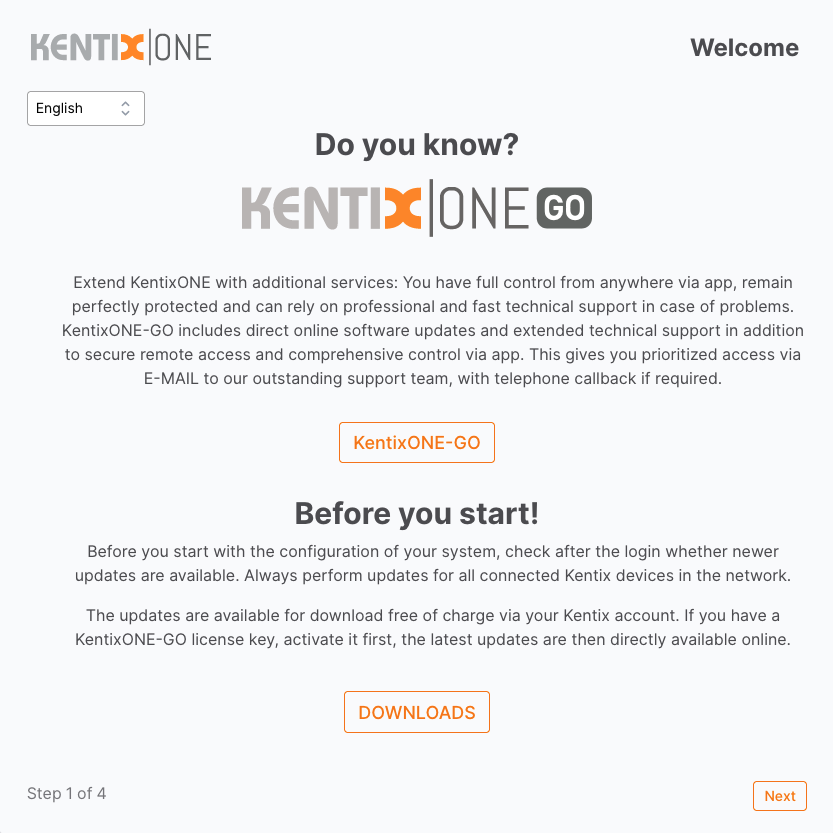
If desired, activate KentixONE GO here and download new firmware updates. They can also perform these steps later. Click “Next” to start the setup of the system.
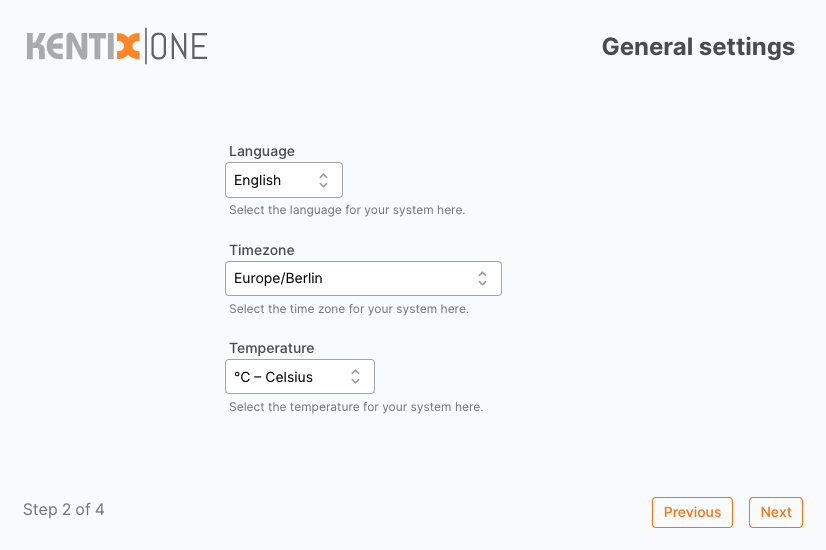
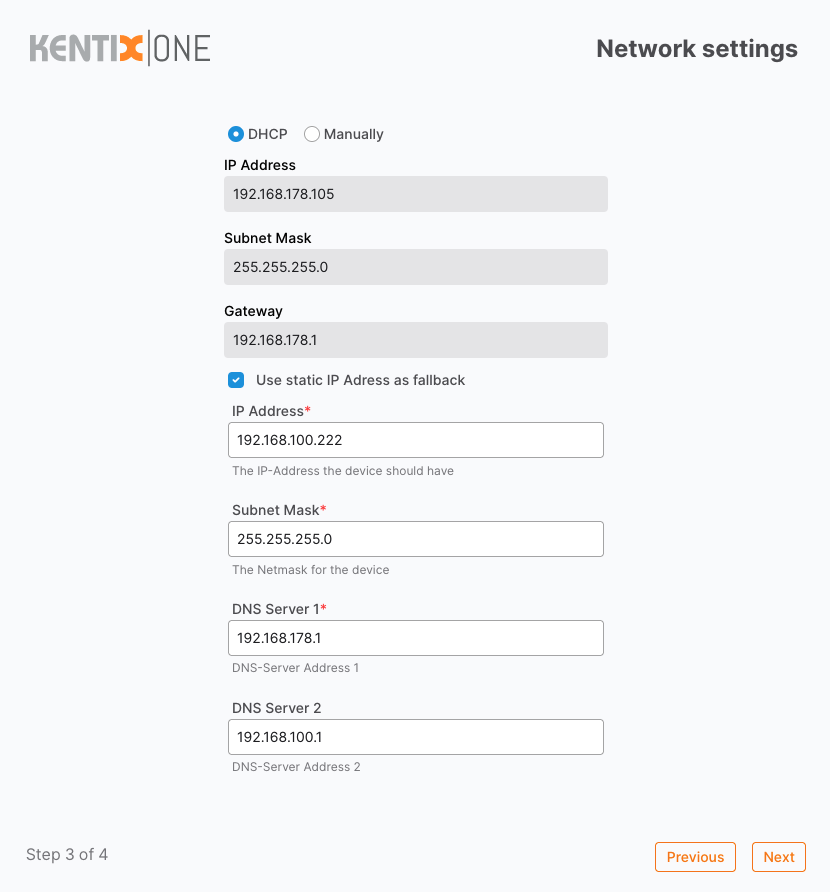
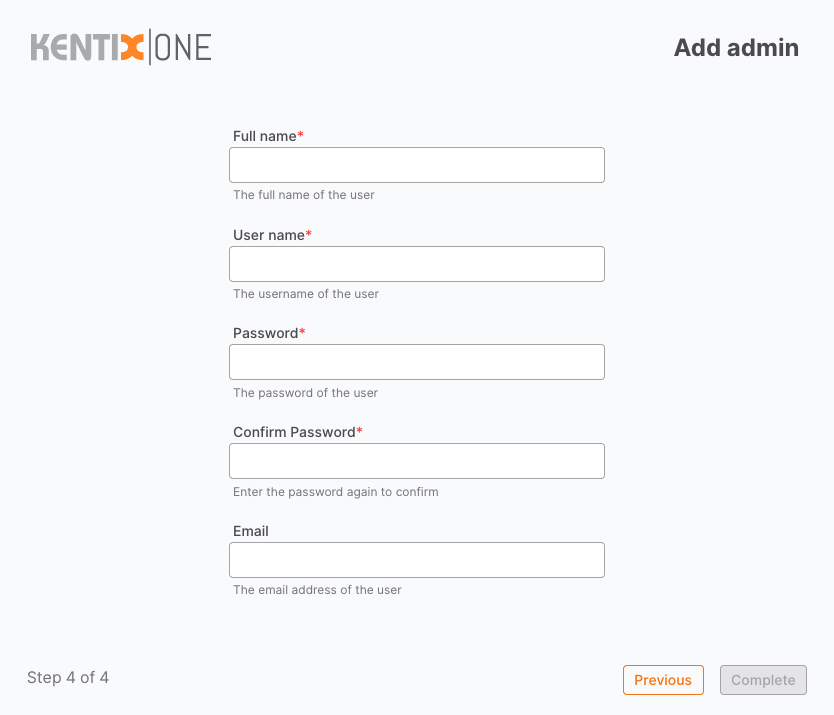

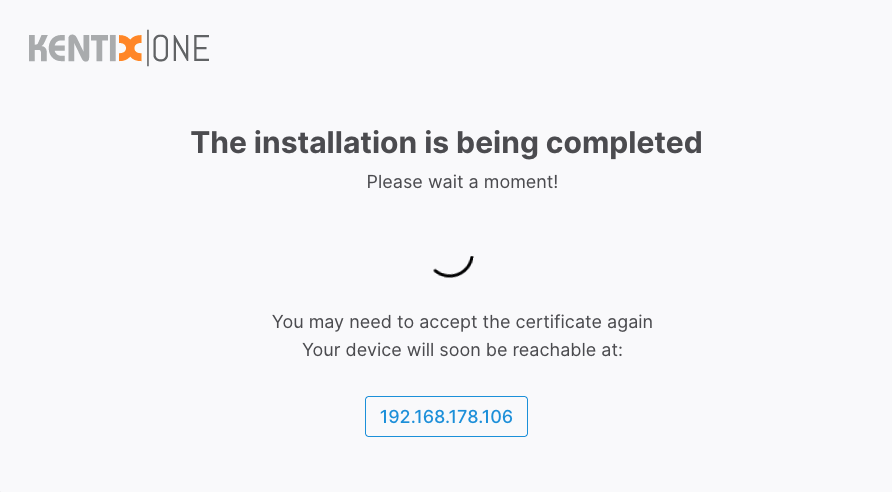
When all settings are saved and the system is ready, you will see a login dialog. This completes the basic installation.
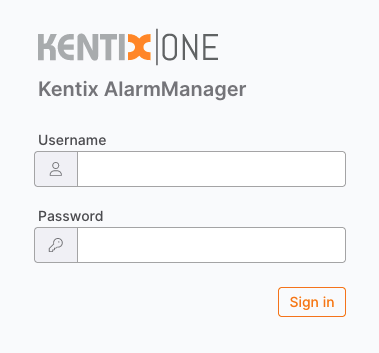
After logging in, you will be presented with the KentixONE Dashboard.
Add another device as a satellite
Call up the web interface of the satellite. The wizard for KentixONE appears here as well.
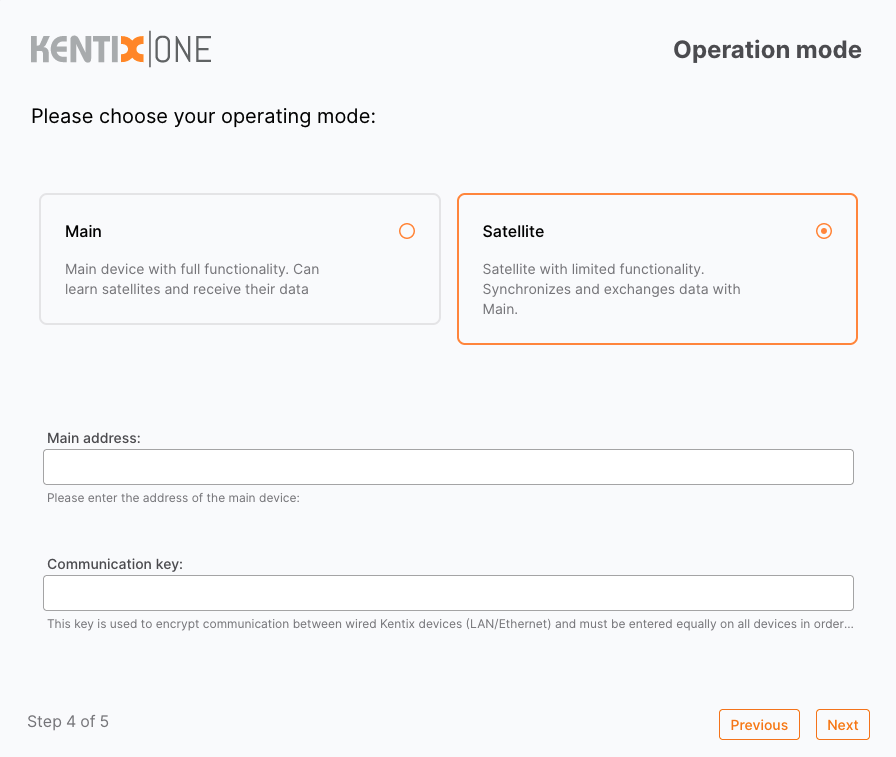
The first steps are identical to the one for the AlarmManager. In step 4, select “Satellite”. Enter the IP address of the “Main” device in the “Main address” field. The communication key remains empty in the example.
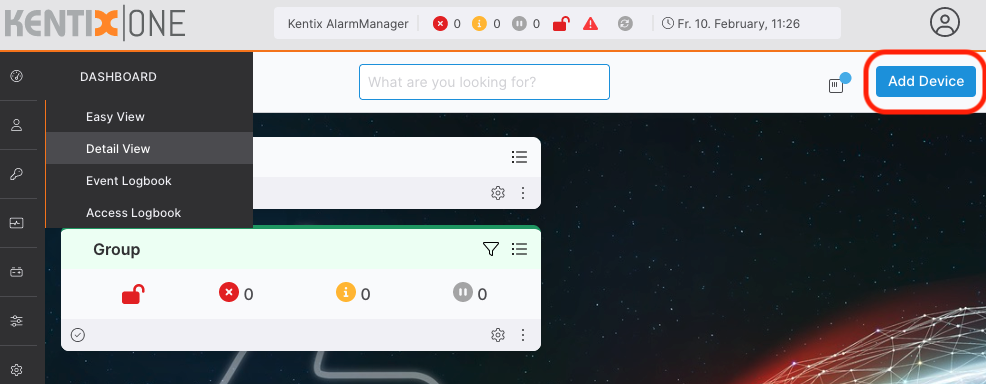
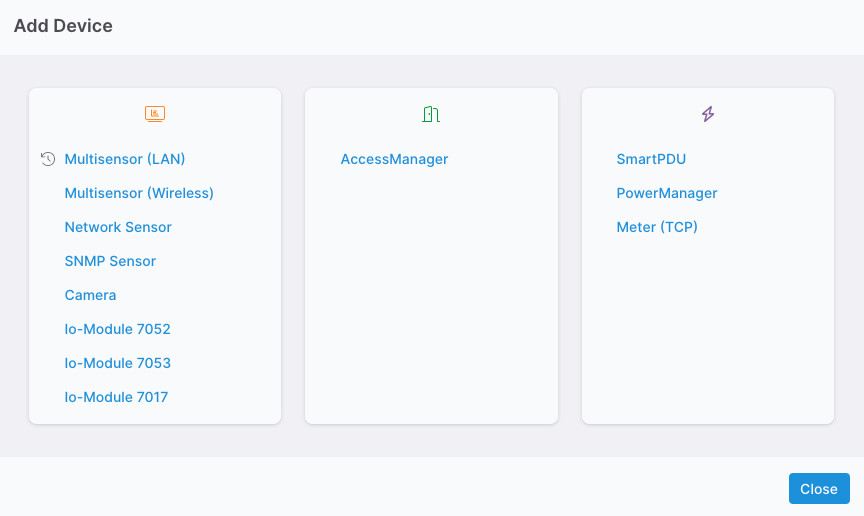
Log on to the manager again. Select “Add device” in the detail view.
Select the type of the desired device(here: Multisensor (LAN))
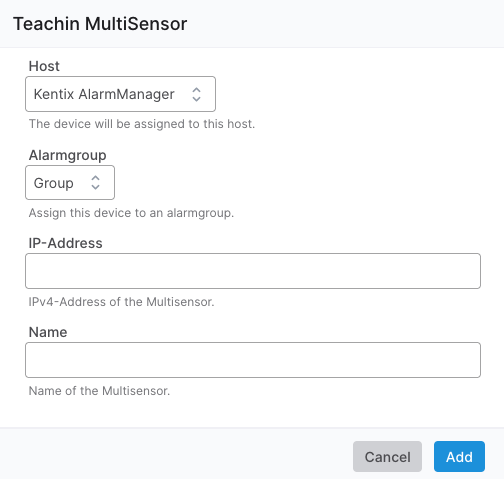
Teach-in dialog. Enter the IP address of the satellite.
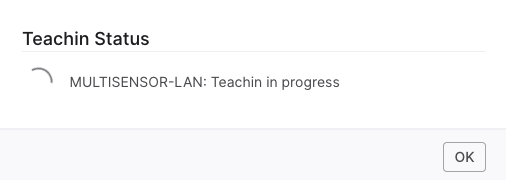
The status of the teach-in is displayed.
After completion, the satellite is available as a resource in the Manager. All sensor values are now routed to the manager and managed here.