
Quick Start Manual
Overview
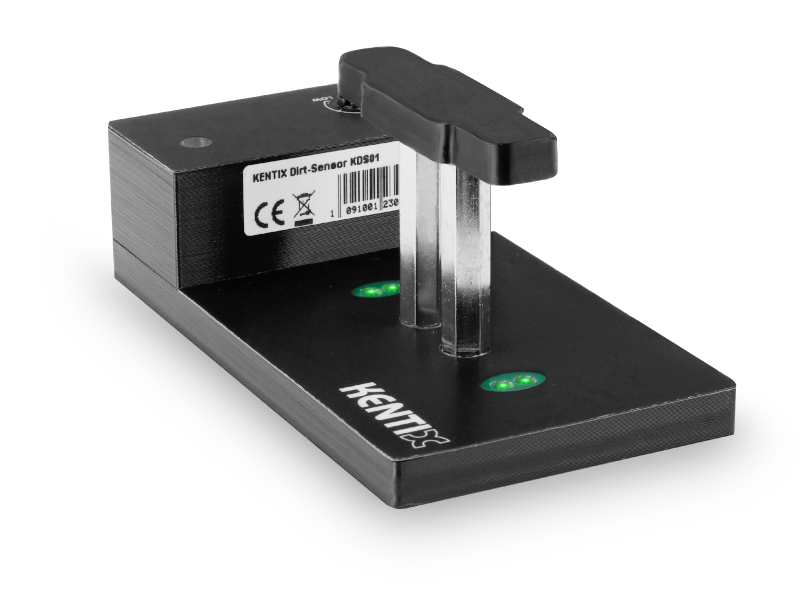
The DustSensor measures dust and dirt deposits on a surface on an optical basis and can be connected to all Kentix devices with SystemPort (SiteManager (appliance), AlarmManager, MultiSensor (Ethernet) and AccessManager (wireless)) directly and without an external power supply. The installation is carried out on surfaces on which increased dust-dirt deposition is to be expected, e.g. floors of IT racks, raised floors in data centers.
Safety instructions
No modifications of any kind may be made to Kentix GmbH products, with the exception of those described in the relevant instructions.
When installing Kentix devices, certain degrees of protection must be guaranteed.
Observe the relevant regulations for installations in the respective environment.
Only operate the products within the defined temperature range.
The instructions should be passed on to the user by the person carrying out the installation.
Kentix accepts no liability for damage to the devices or components caused by incorrect installation. Kentix accepts no liability for incorrectly programmed units.
Kentix accepts no liability for faults, material damage or other damage.
moisture, dirt and damage during transportation, storage and operation.
Only operate the products within the defined temperature range.
Installation and battery replacement may only be carried out by trained specialist personnel in accordance with the instructions.
Do not charge, short-circuit, open or heat batteries.
Observe the correct polarity when inserting the batteries.
The devices must always be operated with the batteries intended for the product.
When changing the batteries, always replace all batteries.
Dispose of old or used batteries properly.
Keep batteries out of the reach of children.
Controls
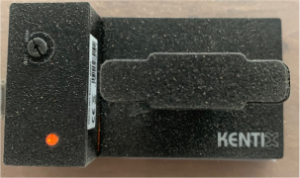
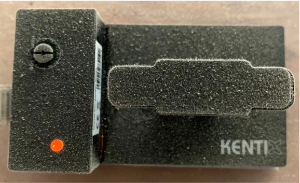
Front view
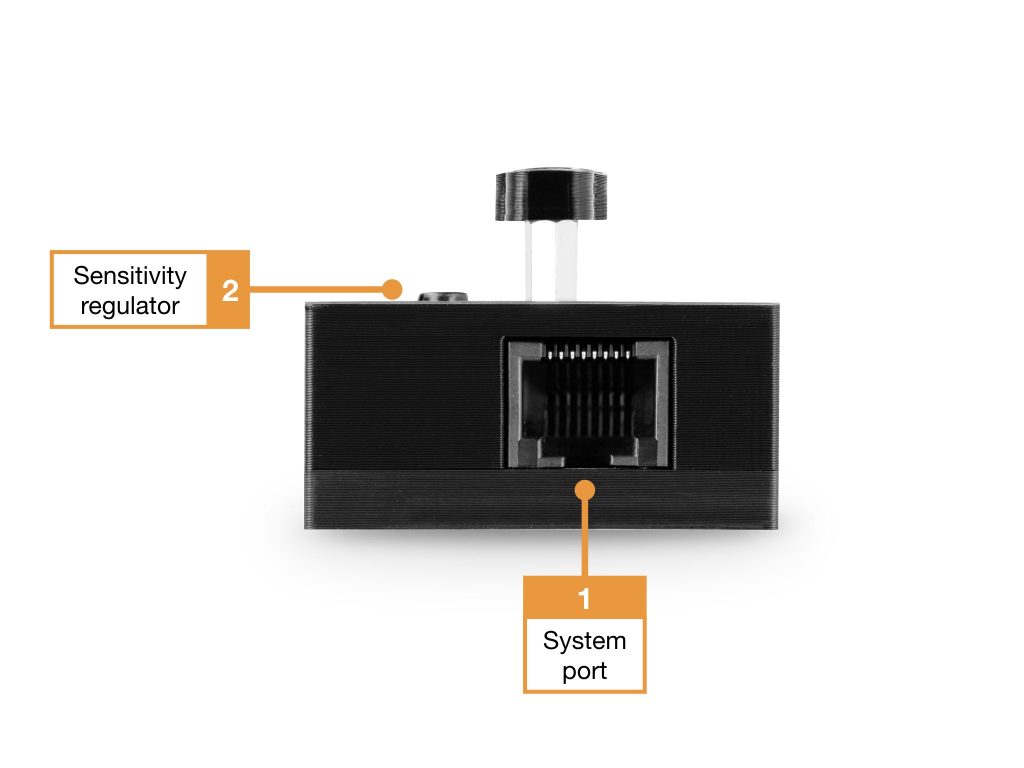
- Kentix SystemPort: For connection to AlarmManager or MultiSensor via standard patch cable
- Positioner for the sensitivity (Low-High)
Top view
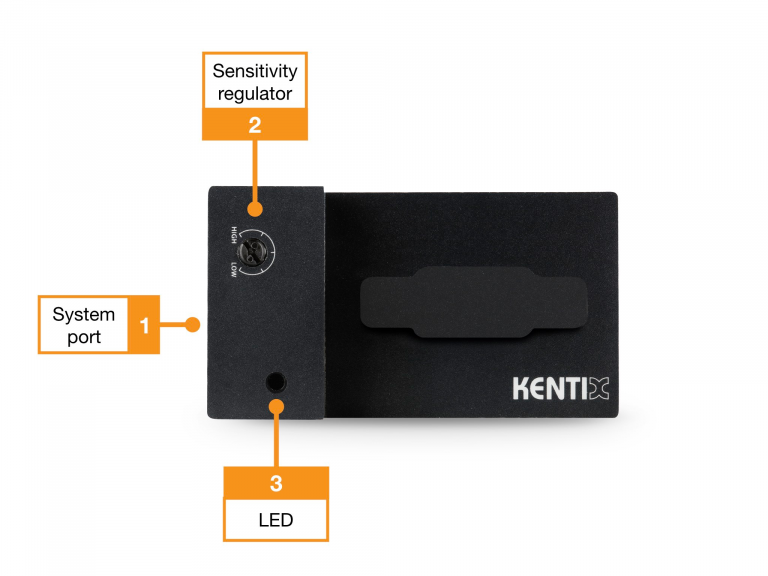
- Kentix system port: For connection to AlarmManager or MultiSensor via standard patch cable
- Positioner for the sensitivity (Low-High)
- Status LED
GREEN: POWER OK, no alarm pending
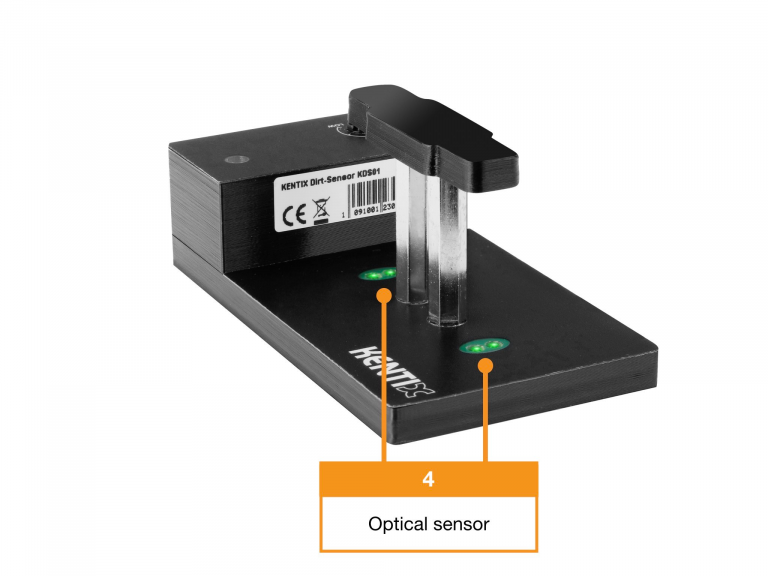
RED: POWER OK, alarm pending - Optical sensors, dust-dirt detection is performed by both sensors
Connection of extensions at the system port
Additional system components such as leakage sensors, door contacts or external alarms from UPS or air conditioning units can be connected via the Kentix system port. The system port has 2 digital inputs and 2 digital outputs which are available via a RJ45 socket.
An extension module (ORDER CODE: KIO3) is required to connect external alarms. Above this, 2 potential-free contacts and 2 changeover relays can be wired.
A commercially available network patch cable (unshielded/shielded) with a length of up to 20 m can be used as the cable connection between the Kentix system port and the system component.
The assignment of the system port
| System port (type: RJ45) | Assignment of the contacts |
|---|---|
 | 1. Internal system voltage (GND) – Not for external use* 2. Output 1 (open collector, max. 100 mA) 3. Output 2 (open collector, max. 100 mA) 4. External voltage / BUS (depending on device type) 5. External Voltage / BUS (depending on device type) 6. Input 1 (Potential-free connection) 7. Input 2 (Potential-free connection) 8. Internal System Voltage (5/24 VDC) – Not for external use* * These connections are intended for internal use only |
Connection
The DustSensor is connected to the SystemPort of the remote station using an RJ45 patch cable. Power supply and alarming is done directly via the SystemPort.
The dust sensor and the alarm behavior are configured via the integrated web server of the main device. Assign a suitable designation such as “Dust alarm” for the external alarm input 2 via the remote station configuration. The alarm logic must be set to “Alarm when open”.

Adjusting the sensitivity
| High | Medium | Low |
|---|---|---|
 |  |  |
| If the sensor is set to a high sensitivity, it will detect even a small amount of contamination. | The medium setting is a good basic setting that fits well for most applications. Typical levels of contamination in the IT cabinet are detected here. | With this setting, only coarser contamination is reported. This should be chosen for areas that get dirty quickly and heavily. |
After triggering, the sensor can be cleaned with a slightly damp cloth and the dust traps are replaced. The medium setting should be selected for a typical IT rack. A good indication of the different levels of contamination is the legibility of the Kentix lettering on the sensor.
Sensor with attached dust traps
The dust catchers (transparent adhesive foil) are included with the sensor. These are bonded directly to the sensors and produce permanent dust adhesion and higher sensitivity. Deise are especially helpful in environments with high air turnover.
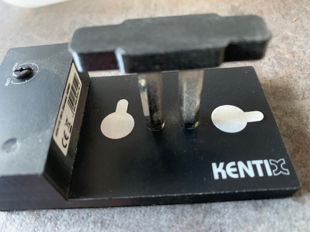
The top is then peeled off and the following effects are created:
- The dust adhesion is increased by the double-sided adhesive film
- The sensitivity of the sensor is doubled
Mounting
The installation is typically carried out on surfaces where increased dust-dirt deposition is to be expected, e.g. floors of IT racks, raised floors in data centers. A magnetic tape is attached to the underside of the sensor. This allows the sensor to be easily fixed to the surface to be monitored. Select an area as an assembly site where the most dust/dirt accumulation occurs or is expected. After triggering due to contamination, the sensor can be cleaned again with a slightly moistened cloth. The dust catchers can also be replaced after triggering.
