
DATASHEET KFLASH-ETH-01
Overview
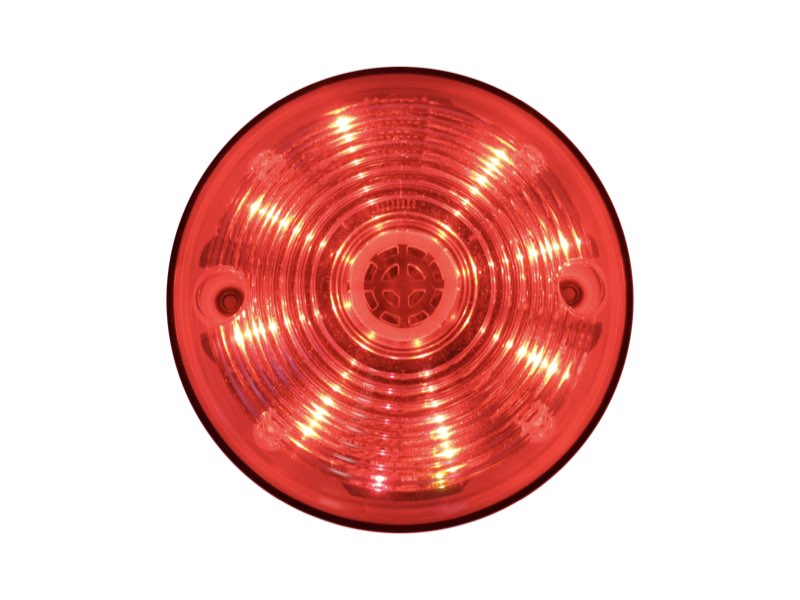
The alarm siren is used for acoustic and visual signaling in the event of an alarm. The siren is network-compatible and is supplied with power via Power over Ethernet. The siren is operated as part of a network and is configured via a web browser in KentixONE. The configuration is carried out via signaling profiles.
Safety instructions
No modifications of any kind, other than those described in an appropriate manual, are permitted to Kentix GmbH products.
Certain levels of protection must be provided when installing Kentix equipment.
Observe the relevant regulations for installations in the respective environment.
Only operate the products within the defined temperature range.
The instructions should be passed on to the user by the person carrying out the installation.
Kentix accepts no liability for damage to the equipment or components resulting from incorrect installation. No liability is accepted for incorrectly programmed units.
Kentix shall not be liable in the event of malfunctions, damage to property or other damage.
Protect moisture, dirt and damage.
Only operate the products within the defined temperature range.
Installation and battery replacement may only be carried out by trained personnel in accordance with the instructions.
Do not charge, short circuit, open or heat batteries.
When inserting the batteries, pay attention to the correct polarity.
The devices must always be operated with the batteries intended for the product.
When changing batteries, always replace all batteries.
Dispose of old or used batteries properly.
Keep batteries out of the reach of children.
Mounting
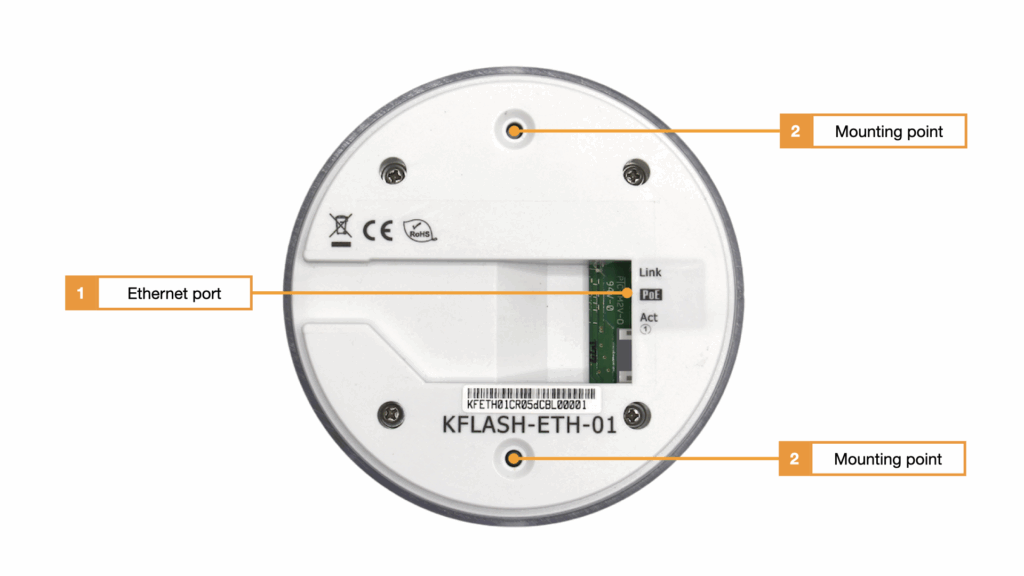
- Ethernet port with Power over Ethernet (100MBit, PoE Class 3)
- Fastening points
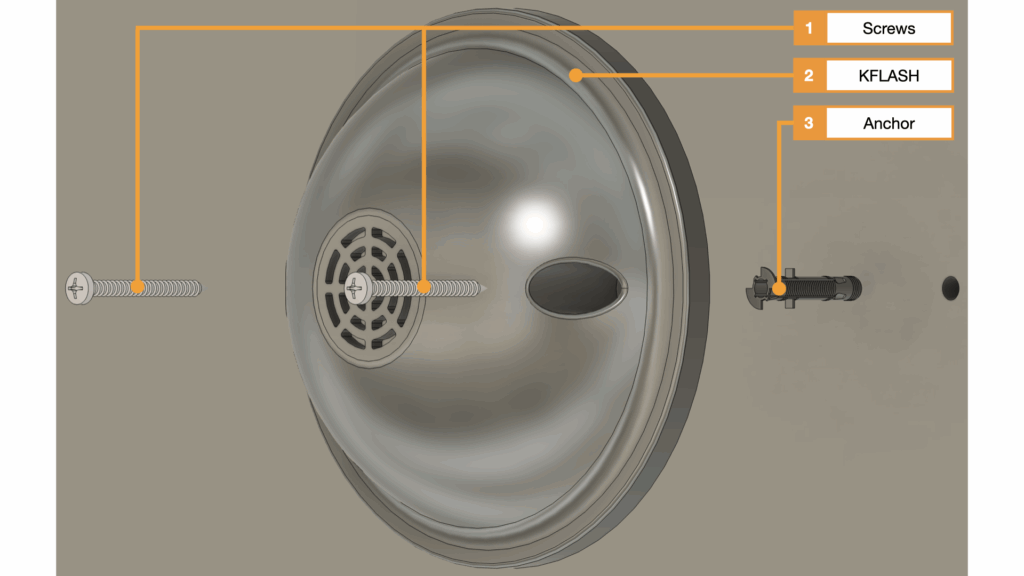
- Screws from the supplied screw and plug set
- Alarm siren KFLASH-ETH-01
- Dowels from the supplied screw and dowel set
The alarm siren can be screwed to the mounting points described above using the screw and plug set supplied.
Outdoor use
The alarm siren can be used outdoors as long as the installation location is protected against direct weathering. By using a waterproof membrane and appropriate wall mounting, the alarm siren is protected against falling spray water up to an angle of 60° to the vertical. For wall mounting outdoors, the cable outlet must always point downwards. The following steps are required to attach the membrane:
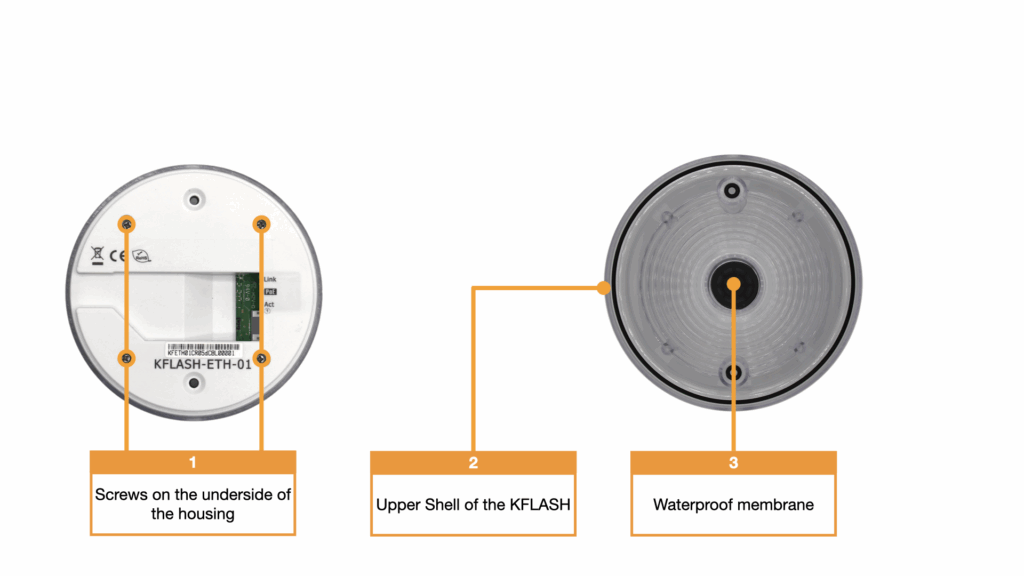
- Unscrew four screws on the underside of the housing
- Lift off the top shell of the alarm siren
- Attaching a waterproof membrane to the top shell
- Replace the upper shell and screw tight (torque: 0.6 Nm)
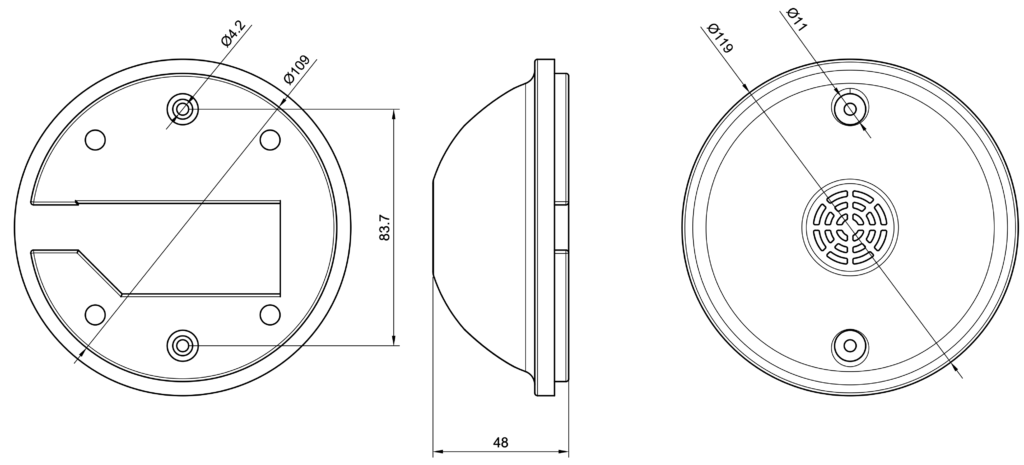
Dimensions
Configuration with KentixONE
Initial configuration
For initial configuration, use the IP address printed on the device. Please note the network settings of your connected PC.
The factory IP addresses at a glance:
| SiteManager and AlarmManager | 192.168.100.222 |
| MultiSensor | 192.168.100.223 |
| AccessManager | 192.168.100.224 |
| PowerManager | 192.168.100.225 |
| SmartPDU | 192.168.100.226 |
| Alarm siren | 192.168.100.233 |
The factory-set password for the alarm siren is “password”. To change the network settings of the siren, the preset password must be replaced with a new one. The factory password and the new password must not be the same.
The required configurations can be made under the “Network” menu item so that the alarm siren can be taught into KentixONE.
In addition to the address and name, a signal profile must be assigned to the alarm siren. A signal profile is an assignment of events and signal types. The signal type specifies the color, tone and duration of the optical-acoustic signaling.
The visual signaling can be configured in terms of duration, color and mode. For the mode, a distinction can be made between fast and slow flashing as well as permanent signaling.
There are four different tones to choose from when configuring the acoustic signaling. The duration and volume of the signaling can also be set.
The configuration of both the visual and acoustic signaling can be clearly displayed via a preview.
Reset to factory settings
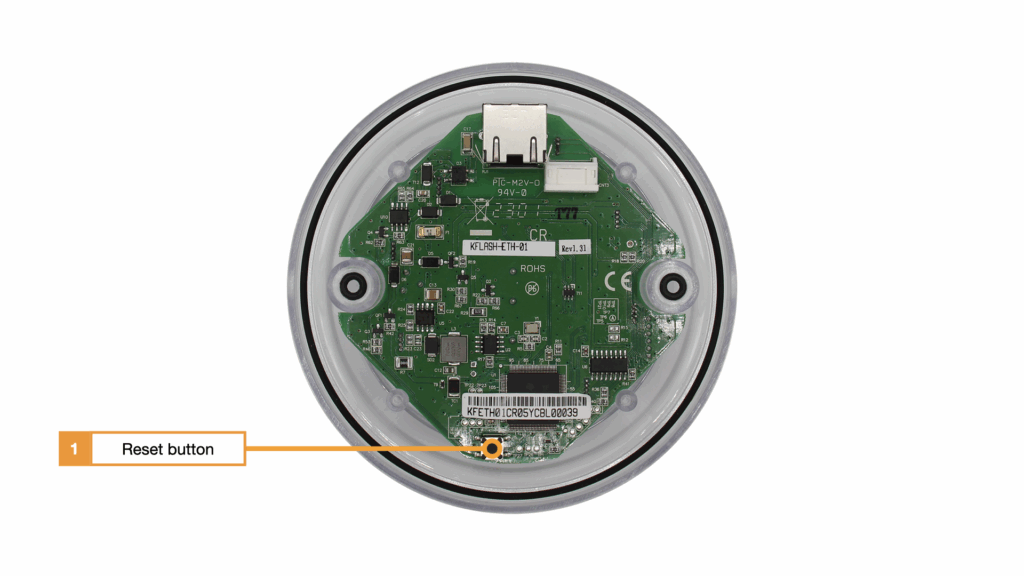
- Reset button
The following steps are required to reset the alarm siren to the factory settings:
- Unscrew four screws on the underside of the housing
- Remove the lower shell of the alarm siren
- Press and hold the reset button for five seconds until the LEDs light up red
- Replace the lower shell and screw tight (torque: 0.6 Nm)
- Sirene can now be reached again via the default values (IP: 192.168.100.233, PASSW: password)