
PRTG Network Monitor is a monitoring software from Paessler for monitoring the entire network. This article explains how to integrate Kentix devices with PRTG.
The following integration options are available
- SMS gateway function
- SNMP integration
- REST API integration
SMS gateway function
The Kentix AlarmManager offers you the possibility to provide an SMS gateway that can be used by PRTG if the GSM function is enabled. The function is activated under the menu item Configuration –> GSM –> SMS gateway. For the gateway you assign a password here.
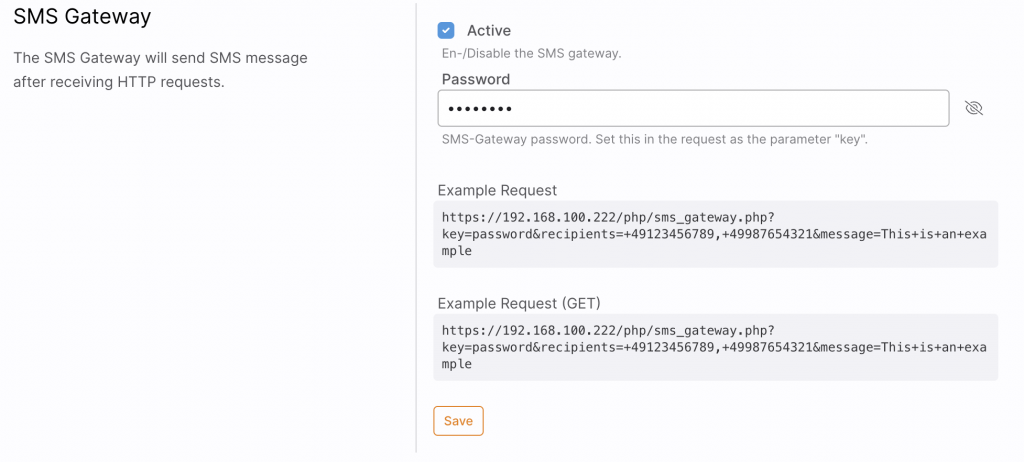
After the SMS gateway has been activated in AlarmManager, it can be configured in PRTG. To do this, navigate to Configuration –> System management –> Sending notifications . Under the item Dispatch via SMS you configure a user-defined URL.
https://192.168.100.222/php/sms_gateway.php?key=password&recipients=%SMSNUMBER&message=%SMSTEXT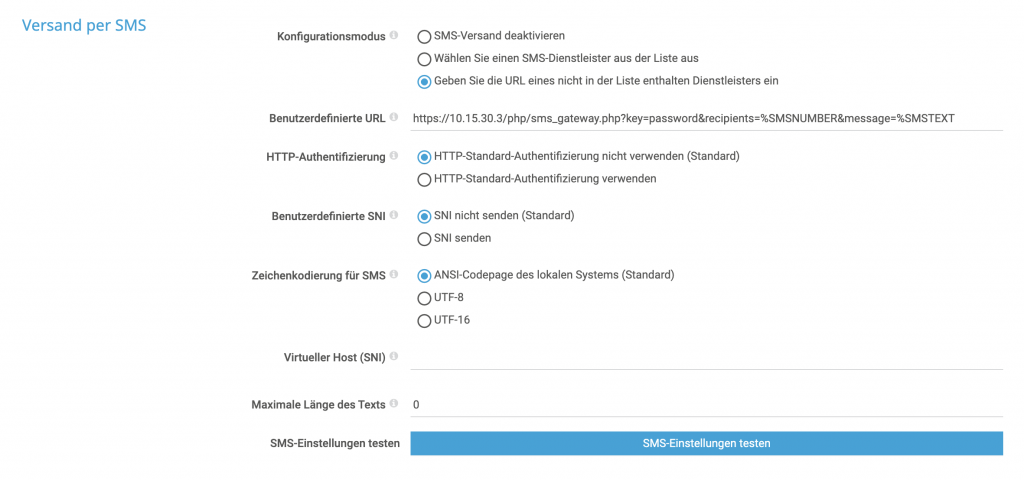
SNMP integration
The Simple Network Management Protocol is a network protocol for monitoring a wide range of components. The protocol exists in versions 1 to 3. The focus in version 3 is mainly on the use of security mechanisms for authentication between agent and manager. By default, the SNMP protocol uses UDP port 161 to query agents and UDP port 162 to receive traps.
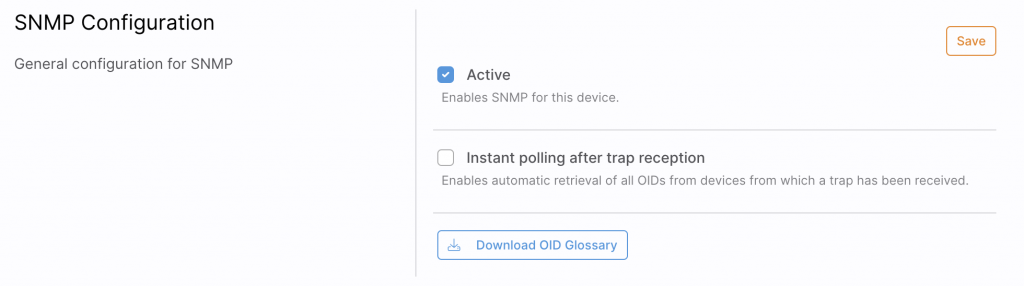
Kentix devices support SNMP protocols v2 and v3 and therefore offer the possibility to implement SNMP queries with increased security requirements. The use of SNMP can be activated in the main device under the menu item Configuration –> Communication –> SNMP. The OID glossary is then directly available for download. This CSV list contains a dynamically generated list of all values provided by your Kentix device. Furthermore, you can download the Kentix MIB file directly from the store, and use it to run queries directly against your Main device.
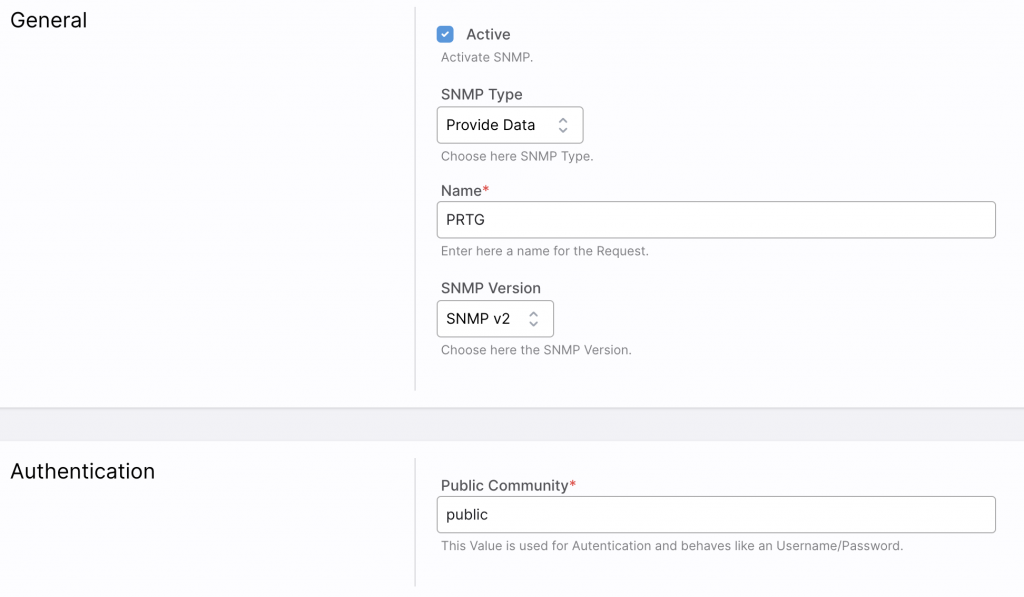
After SNMP activation, you can create different SNMP types. For integration into PRTG you need the type Provide data in any case. This makes your Kentix system accessible under the configured settings for the PRTG server and you can query values there.
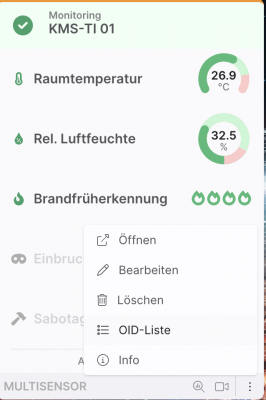
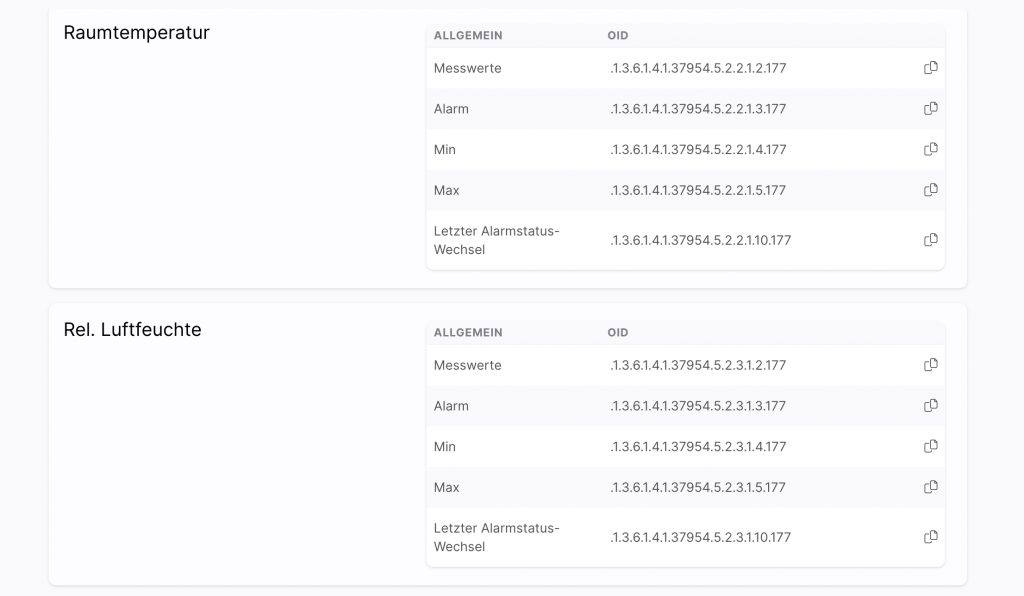
You can either find the individual data points of your Kentix system in the OID glossary or retrieve them directly from the individual devices.
To display the desired data point in PRTG, create a device in the first step. The IP address here is always the main device. In the second step, you create a sensor of type SNMP (Custom) . In the following input mask, you add the required data, essentially the OID that is to be queried.
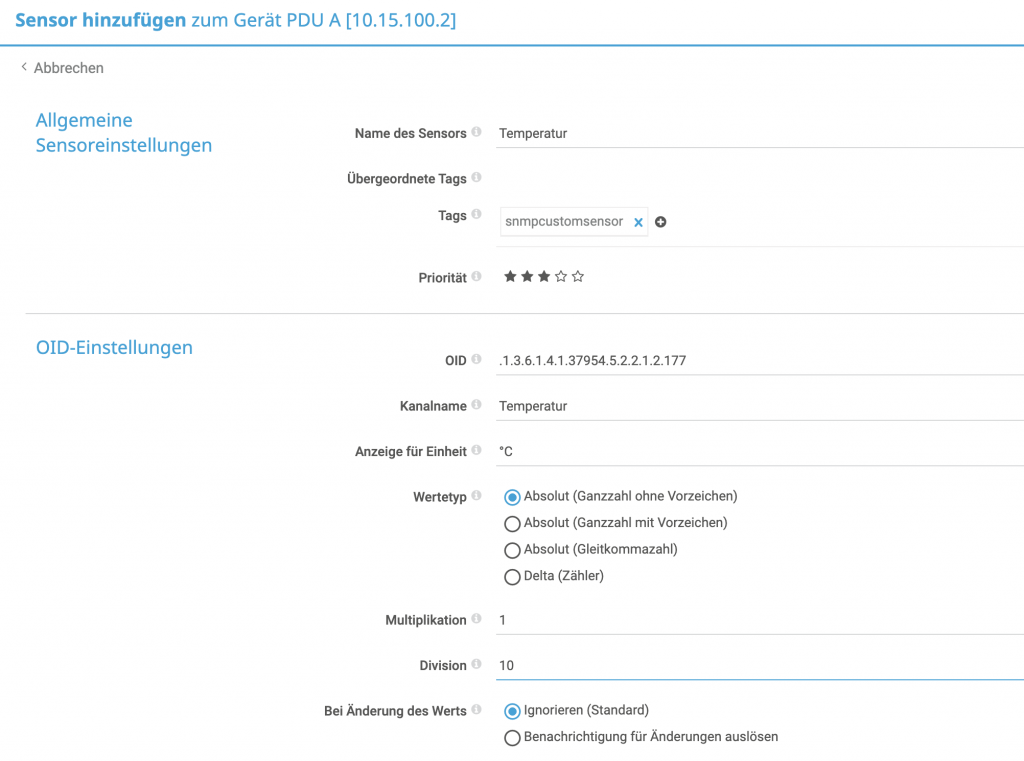
This will show you the desired data point from the Kentix system in PRTG.
API integration
Kentix devices provide a REST API as another interface for integration. PRTG offers you the possibility to create API sensors to query values via the Kentix API. Currently PRTG provides the REST v2 sensor, as this is still in BETA phase, the usage has to be enabled separately
As an authentication method to the API, Kentix uses user-based bearer tokens. The respective token can be viewed directly in the user settings.

To determine the desired values we recommend the software Postman, this gives you the possibility to address an API with different HTTP methods and the desired authentication. The main route that provides you with readings from all Kentix devices is.
GET https://192.168.100.222/api/systemvaluesTo determine the detailed values of an individual sensor, you need its ID. This can be found, for example, in the response of the API route mentioned above. Alternatively, it is also possible to edit the device in the web interface. The ID is then displayed as part of the browser URL. With a PDU, this then looks like this.
https://192.168.100.222/powermanagers/136With the desired ID you can extend the API route so that only the detailed values of the device are specified
GET https://10.15.100.2/api/systemvalues/devices/136As a response you will get the data in JSON format
...
            "address": "10.15.36.231",
            "mac_address": "70:82:0e:10:d0:24",
            "is_satellite": true,
            "fuses": [
                {
                    "id": 19,
                    "number": 1,
                    "name": "Fuse 1",
                    "type": 74,
                    "channel": "1",
                    "logic": 0,
                    "value": true,
                    "assignment": "always-active",
                    "status": "ok"
                },
                {
                    "id": 20,
                    "number": 2,
                    "name": "Fuse 2",
                    "type": 74,
                    "channel": "2",
                    "logic": 0,
                    "value": true,
                    "assignment": "always-active",
                    "status": "ok"
                },
                {
                    "id": 21,
                    "number": 3,
                    "name": "Fuse 3",
                    "type": 74,
                    "channel": "3",
                    "logic": 0,
                    "value": true,
                    "assignment": "always-active",
                    "status": "ok"
                }
            ],
            "active_state": "active",
            "measurements": {
                "humidity": {
                    "min": "10",
                    "max": "80",
                    "assignment": "always-active",
                    "value": "26.8",
                    "status": "ok"
                },
                "vibration": {
                    "assignment": "off",
                    "value": null,
                    "status": "inactive"
                },
                "rcm_ac": {
                    "max": "30",
                    "assignment": "always-active",
                    "value": "4.20",
                    "status": "ok"
                },
                "rcm_dc": {
                    "max": "30",
                    "assignment": "always-active",
                    "value": "0.00",
                    "status": "ok"
                },
                "temperature": {
                    "min": "10",
                    "max": "35",
                    "value": "33.2",
                    "assignment": "always-active",
                    "status": "ok"
                },
                "dewpoint": {
                    "hysteresis": "2",
                    "value": "11.6",
                    "assignment": "always-active",
                    "status": "ok"
                },
                "heat": {
                    "max": "10",
                    "value": "0.0",
                    "assignment": "always-active",
                    "status": "ok"
                },
                "co": {
                    "value": null,
                    "assignment": "off",
                    "status": "inactive"
                },
                "connection": {
                    "status": "ok",
                    "assignment": "system",
                    "last_updated": "2023-05-15T08:23:57+0200"
                }
            },
            "phases": [
                {
                    "id": 58,
                    "device_id": 136,
                    "number": 1,
                    "name": "L1",
                    "consumption": {
                        "value": "0.00",
                        "assignment": "always-active"
                    },
                    "active_power": {
                        "max": "2300",
                        "value": "0",
                        "assignment": "always-active",
                        "status": "ok"
                    },
...
From this response, you can now extract the desired data using the query language JSONPath. There are some online editors for this, e.g. https://jsonpath. com/ As input you copy in the answer of your query and can then navigate to the desired data point in the upper area.
In the example, the active power of phase 2 of a PDU.
$.devices[0].phases[1].active_power.value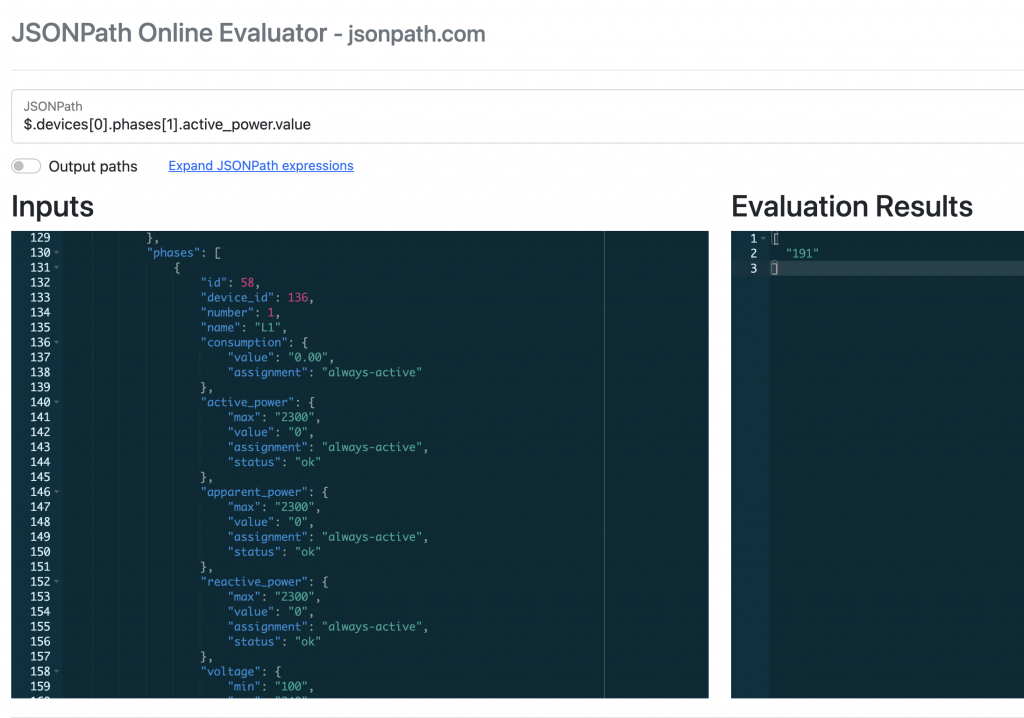
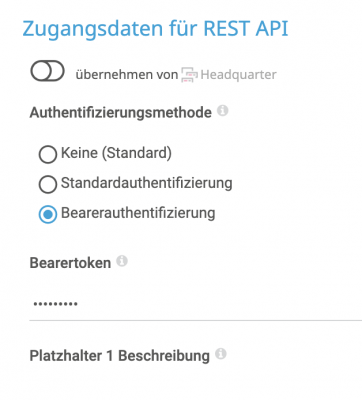
With this information, you now create a REST v2 sensor in PRTG for your Kentix main device. In the group settings, directly configure the Bearer token for API authentication on the Kentix device in the credentials.
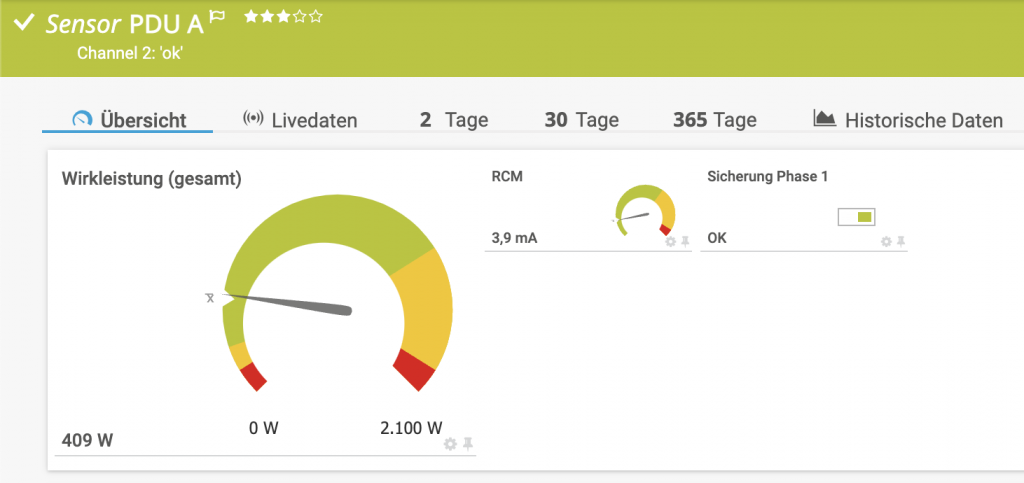
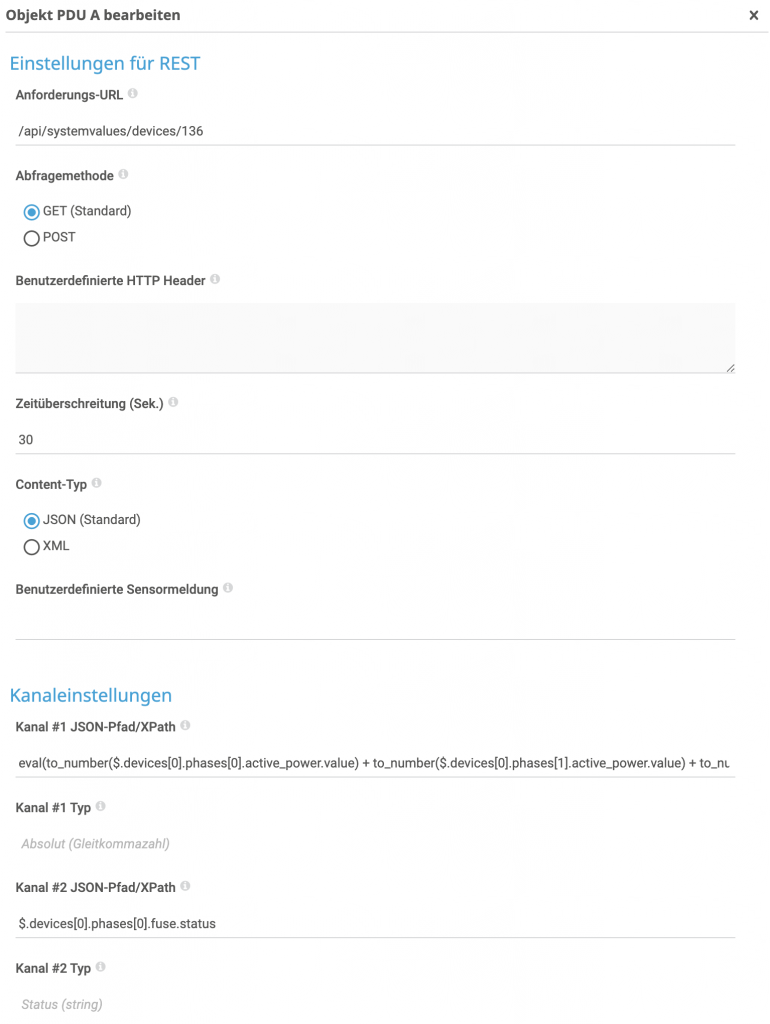
In the sensor itself, you then configure the query URL and subsequently have the option of creating up to 10 channels. In the example, the values of a PDU are queried and the active power of the 3 phases is added together and displayed in the first channel. Furthermore, the RCM value as well as the fuse status of phase 1 is displayed. The finished sensor then looks like this.
The sensor configuration is done during creation.
Typical query values for the API route /api/systemvalues/devices/<device-id>
Total active power of a 3-phase PDU
eval(to_number($.devices[0].phases[0].active_power.value) + to_number($.devices[0].phases[1].active_power.value) + to_number($.devices[0].phases[2].active_power.value))RCM value
$.devices[0].measurements.rcm_ac.valueBackup status
$.devices[0].fuses[0].statusTemperature value
$.devices[0].measurements.temperature.valueCO alarm
$.devices[0].measurements.co.status